Sugar skulls are a decoration that is closely associated with the Dia de los Muertos, or the day of the dead. The traditional folk art have been made for centuries in Mexico. The skulls represent the souls of loved ones who have died, and they are typically decorated with colorful icing, ribbons and other decorations to celebrate the life of the departed. Sugar skull making is a very traditional craft and it’s not a difficult one to get started with if you want to try making your own sugar skulls at home.
To make sugar skulls, all you need is sugar, water and a skull-shaped mold. You moisten the sugar with the water, then pack it firmly into your molds and allow it to dry completely. There are all kinds of molds available, both very traditional clay molds and more modern silicone ones. I find that silicone ice cube molds are very easy to work with because they give the skulls a distinctive shape and are flexible enough to allow the sugar to be easily removed after it cures. Plastic candy molds are very inexpensive and are usually a good choice for making smaller molds.
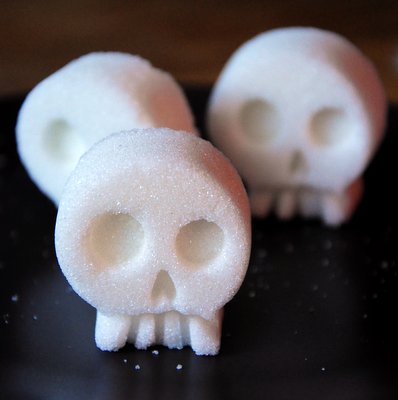
I used  Bone Chillers Ice Cube Tray for the skulls pictured here. They don’t have the most traditional look to them – the most traditional more closely resemble real skulls – but I really like the clarity of these skulls. The mold also makes crossbones, if you want to use your sugar skulls for more scary Halloween decorations. Once you’ve made your skulls, you can decorate them with royal icing or just put them on display as-is. If you want to make the skulls themselves more colorful, you can even incorporate a few drops of food coloring in with the water as you prepare the sugar mix.
Homemade Sugar Skulls
1 cup sugar
1/2 – 1 tsp water
skull mold
In a small bowl, mix together the sugar and water with a fork until all the sugar is moistened, about 1 minute. You only need a very small amount of water to dampen the sugar. The sugar is ready when you can squeeze it in your fist and it will hold its shape without feeling wet. If it is too well, add in additional sugar and stir again.
Transfer sugar into skull molds and pack it very firmly into place. Allow skulls to sit in a dry place, uncovered, to cure for 12-24 hours before unmolding.


Lucy @ Bake Play Smile
October 18, 2013These are very, very cool! Love them as something a little bit different from halloween! Thanks 🙂