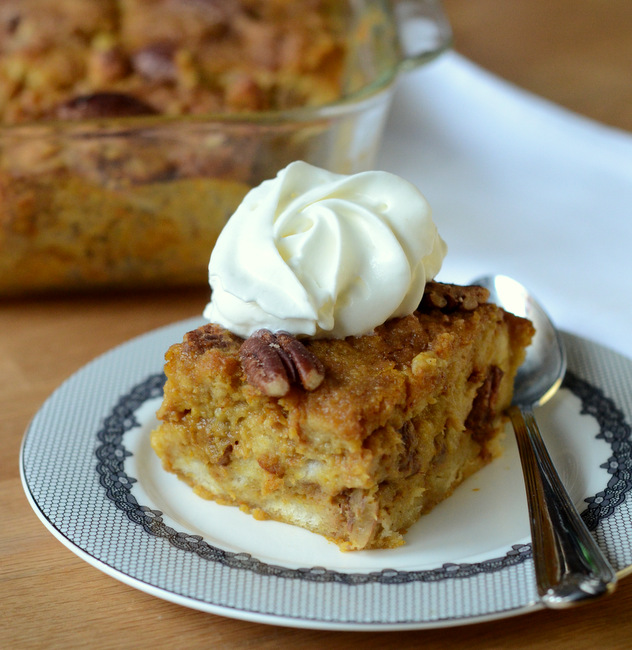
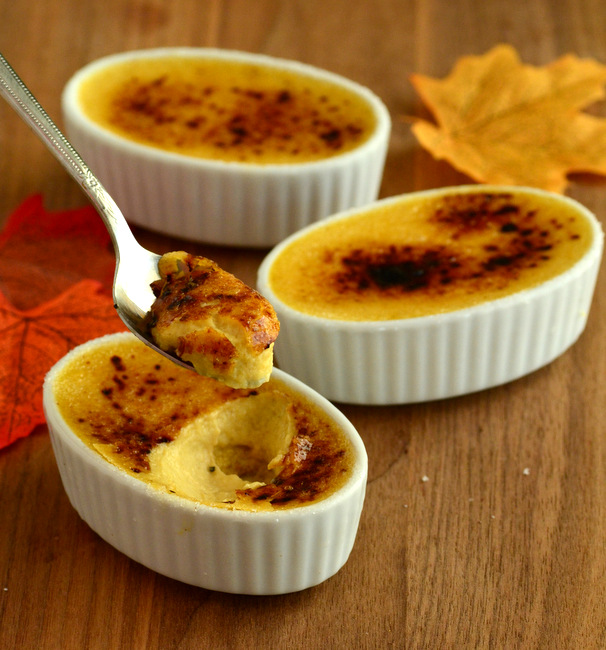
Archive for the ‘Puddings, Custards and Mousses’ Category

Eggnog is a thick, dairy-based drink made with milk, sugar, eggs and spices, usually nutmeg and vanilla. It is often spiked with a little bit of liquour and it is typically served during the winter, particular around holidays like Christmas and New Year’s. It’s a fun drink to make, but the thick, creamy beverage can also be put to a number of other good culinary uses and lend its unique flavor to other desserts.
This Eggnog Panna Cotta is a perfect example. Panna cotta is a light, delicate custard that uses gelatin to thicken it. Eggnog has a thick, rich consistency and adds just the right amount of creaminess to a panna cotta – along with a Christmasy flavor. To make the base of the recipe, I combined milk, eggnog, vanilla, nutmeg and some sugar with a little gelatin. Once all the ingredients are incorporated, the mixture can be left alone to set in ramekins in the fridge. Although you can make your own eggnog, storebought eggnog works just fine in this type of recipe. I recommend using a full fat eggnog (although the recipe will still set if you use a low fat type) because you’ll get a much better, creamier result in the end.
Eggnog is often served spiked with rum or brandy. I personally like it plain, with the flavors of egg, vanilla and nutmeg shining through, so that is how I left this panna cotta flavored. If you want to spike your panna cottas, substitute a small amount of the milk with rum (3 tbsp should be sufficient) and make the recipe as directed, dissolving the gelatin in the milk and adding the rum in with the eggnog. You can also add in 1/2 tsp rum extract without changing anything else in the original recipe.

+Continue Reading

Creme brulee is one of those desserts that most people only have in restaurants because they don’t know that it’s actually a very simple dessert to make at home. A basic creme brulee is a baked vanilla custard that is topped with a layer of caramelized sugar. The sugar snaps when you crack into it with a spoon, revealing the smooth custard below. The caramelized sugar can get a slightly burnt in places, adding a slightly bitter flavor that is actually a lovely contrast to the sweet, creamy dessert.
Another reason that many people don’t make creme brulee at home is that they feel it requires special equipment. Most creme brulees are served in small, flat dishes or unusually shallow ramekins where you get a high crust-to-filling ratio. You don’t need any special dishes: regular 4 or 6 ounce ramekins (or other similar sized, oven-safe baking cups) still make a very good creme brulee and have the advantage of giving you a thicker and more indulgent custard layer. The sugar is typically cooked with a kitchen torch, and you can caramelize yours under the broiler if you don’t have one. That said, a kitchen torch is one piece of equipment I would definitely recommend getting because (a) if is fun to use and (b) you’ll be more likely to make creme brulee when you already have one.
This creme brulee is starts by making an egg-rich custard on the stove. Since creme brulee should be an indulgent dessert, I use some heavy cream when making mine. You can infuse the cream with a vanilla bean in advance, or simply add vanilla flavor with vanilla extract – both options work well. As much as I like vanilla beans, using vanilla extract seems to let the naturally eggy flavor of the custard come through a bit more. Once the custard has been prepared, it is poured into ramekins and baked in a water bath. The water bath keeps the custard at a low, consistent temperature and prevents bubbles from forming and helps keep the top of the custard smooth. If the top of your custard browns a little bit during baking, don’t worry, as it will be covered with sugar when you brulee it.
The custards should be thoroughly chilled before adding sugar for the topping. I like to use super fine sugar, but regular sugar will also work (finer sugar is generally better for this than coarser sugar because it melts faster), and I put a generous layer on so I will have a nice, thick crust. I caramelize it using my kitchen torch, then allow the caramel to set for about a minute before serving. You end up with a crisp caramel that is still warm and a cool custard below. The creme brulees can be bruleed in advance and stored in the refrigerator, but it is best not to leave them in the fridge for more than 1-2 hours to ensure that the caramel will remain perfectly crisp when ready to serve.

+Continue Reading

When I was a kid, I never really had butterscotch pudding. I liked vanilla and chocolate puddings and often campaigned to see pudding cups in the fridge or in my lunch. Butterscotch puddings seemed overly sweet, even to me, when I had them so it just wasn’t a go-to flavor for me. That said, the first time I had homemade butterscotch pudding, I was a convert. Silky smooth and not too sweet in spite of its rich brown sugar flavor, homemade butterscotch pudding had me hooked from the first bite.
This is my version of Classic Butterscotch Pudding, a recipe I’ve been making in one form or another for years now. It gets its butterscotch flavor from dark brown sugar and a small amount of butter that is added to it. There isn’t enough butter to make the pudding taste buttery, but there is enough to ensure a clear butterscotch flavor. The finished pudding is not too sweet and it has a very good balance of brown sugar, dairy and vanilla that makes it quite addictive. Fortunately, since the pudding is neither too sweet nor too heavy, there is nothing wrong with giving into the addiction and having a second serving. Dark brown sugar is going to give you the best finished product and the richest butterscotch flavor. That said, golden brown sugar and even light brown sugar will still work well and produce a tasty pudding.
I also really like the consistency of this pudding. It is not too thick and not too thin, but a silky smooth medium somewhere in between. If you do like your pudding on the thicker side, add an extra 1/2 tbsp cornstarch to thicken it up a bit more. When I make pudding, I’ll use any kind of milk I have in the fridge, whether it is whole or skim milk. Whole milk will always make a slightly richer pudding, but skim milk will actually work out just fine if that is all you have. I recommend using whole milk or at least reduced fat for a pudding that has the best balance and as creamy a texture as possible.
+Continue Reading

Bread puddings are one of those dishes that can be incredible versatile. Like a basic muffin recipe where you can incorporate all different kinds of fruits, nuts and other goodies to change the flavor completely, you can do the same thing with a bread pudding. A basic bread pudding gives you a rich, custardy base for both sweet and savory dishes – and this Fig and Goat Cheese Bread Pudding happens to have both sweet and savory in one dish.
Figs and goat cheese are a great combination any time they meet. I used dried figs in this recipe, which have a rich and intense sweetness to them. Mine were very moist, but you can rehydrate dried figs in a bit of hot water if yours are on the dry side. You can also use fresh figs in this recipe if you have them. The sweetness of the figs contrasts very well with the goat cheese, which has a rich, tangy cream cheese-like flavor with a slightly savory/salty finish to it. The cheese incorporates easily into the bread pudding, but holds its shape and doesn’t melt, so you get pockets of sweet fig and savory cheese in different bites as you eat. The custard for the bread pudding is made with buttermilk, milk and a little vanilla extract.
This bread pudding sounds very grown up, and while it will certainly appeal to adults looking for something a little different, it has a beautifully balanced flavor that almost anyone will enjoy. The dish is fantastic for breakfast or brunch, but also works very well when served for dessert. Serve it plain or dust it with a little bit of confectioners’ sugar to highlight the sweetness of the figs and the vanilla in the custard. It is good both warm and cold (and leftovers keep well in the refrigerator for a couple of days).
+Continue Reading

One of the easiest mousses to make is a lemon mousse, made by folding lemon curd into whipped cream. This type of dessert is delicious, but I wanted to see if I could use it as a base for other simple mousses by trying the concept with other flavors of curd. A fruit curd is a creamy, sweet sauce made with fruit juice or puree, thickened with egg yolks and sweetened with sugar. While lemon curd is easily the most popular, it can actually be made with many different types of fruit. Fresh strawberries, for instance, make a very fine fruit curd that is great on its own and the perfect base for a light strawberry mousse.
This strawberry curd is made just like lemon curd, but using a freshly made strawberry puree where you might normally use lemon juice. I did not strain out any of the tiny seeds, but simply used the puree as it came out of my food processor. To made the curd, the puree is sweetened with sugar and thickened with eggs, resulting in a silky smooth, pink sauce that is a great topping for desserts. To turn it into a mousse, I simply folded some whipped cream into the strawberry curd to give it a light, fluffy texture.
The only catch with this type of mousse is that you can’t use too much curd in the whipped cream, or it will start to deflate it and make the dessert a little heavier. To get more strawberry flavor into my desserts, I put a spoonful of the strawberry curd at the base of each dessert glass before topping it with the strawberry whipped cream. The result was a lovely two-tone dessert that was light, creamy and bursting with fresh strawberry flavor.
+Continue Reading