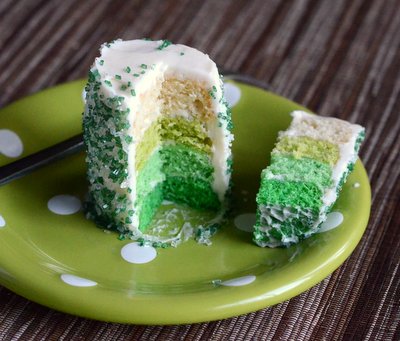
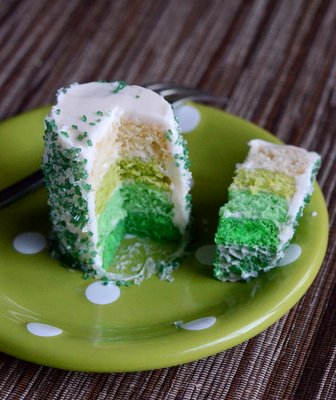
Ombre cakes have a great look to them, and all you need to make one is the time to make a multi-layered cake and plenty of food coloring. Holidays and special occasions like birthdays are the perfect time to play around with colorful cakes like these because you want everything to be as festive as possible, and you usually won’t mind having to put a little extra time into putting together your creation. These Mini St Patrick’s Day Ombre Cakes are cute, colorful cakes to serve in honor of St Patrick’s Day. Each cake is a single serving and each one delivers a big “wow” factor when it is served, since they have a dramatic look to them that you won’t find in most other mini cakes.
The recipe starts out with a vanilla and lime cake batter. You could opt for simply a plain vanilla cake, but I prefer to tie the flavor of my cake into the colors that I am using and I happen to be a big citrus lover (lemon would also work very well here). The batter is divided up into four equal portions and food coloring is added. You can use regular or gel food coloring and get good results. The real key here is to carefully add more and more coloring to each batch so that you have a nice gradient in all of your cake layers. I left the top layer “blank,” used half yellow and half green coloring in the second layer, a medium green in the third layer and a very strong green in the final layer. You can always add more coloring, but you can’t take it away if you add too much, so take your time.
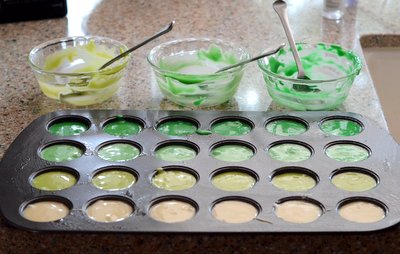
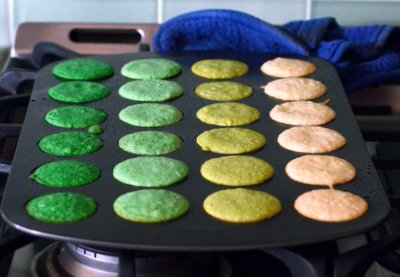
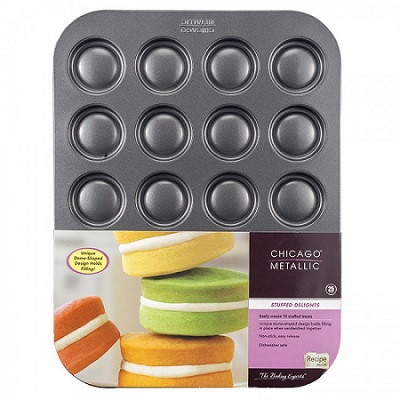
You will need some special equipment to make these cakes look just like mine. I used Wilton’s Mini Whoopie Pie Pan to make the rounds for the layers. The pan is perfect for building a cupcake-sized layer cake without much fuss (in addition to making mini whoopie pies, of course). I simply piped the different colors into the cavities and baked to create perfectly scaled layer cakes. If you wanted to try this with a mini muffin pan, you could expect to get 16 mini cupcakes with this recipe and you’ll have to cut them in half to get thin enough layers to achieve a similar look.
Once the cakes are baked, I started to stack them up with the darkest layers on the bottom. I used a cream cheese buttercream frosting to “glue” the cake layers together. Cream cheese frosting is softer than many buttercreams, but it has a great tang to it that really goes well with lime. Use only a small amount of frosting to hold the layers together because you don’t want the layers to slide around too much. Once the layers are in place, refrigerate the cakes for a few minutes to firm up the frosting before coating the whole exterior with a thin layer of additional frosting.
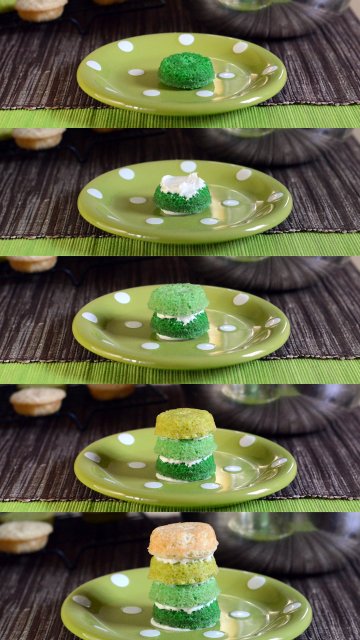
At this point, you can decorate the cakes however you like using colored frosting, sprinkles or even fondant. I simply coated them with a blend of green-tinted sanding sugar to bring some color to the outside. Serve them immediately or store them in an airtight container, where they’ll keep for at least a day or two, if you want to bake them in advance. This recipe can easily be tinted with other colors to make mini ombre cakes for other holidays, too!
Mini St Patrick’s Day Ombre Cakes
14 tbsp all purpose flour (1 cup minus 2 tbsp)
2/3 tsp baking powder
1/8 tsp salt
1 large egg
2/3 cup sugar
3 tbsp vegetable oil
1 tsp vanilla extract
2 tsp lime or lemon zest
3 tbsp milk
yellow, green and blue food coloring, gel or liquid
Preheat oven to 350F. Lightly grease a 24-cavity mini whoopie pie pan
In a small bowl, whisk together flour, baking powder and salt.
In medium bowl, whisk together egg, sugar, vegetable oil, vanilla extract and lime zest. Whisk in half of the flour mixture, followed by the milk. Whisk in remaining flour mixture and stir just until no streaks of dry ingredients remain.
Divide batter evenly into four small-medium bowls. Leave one portion of batter uncolored. Color one portion very light green (three parts yellow, one part green). Color one portion medium green (three parts green, one part yellow). Color one portion dark green (four parts green, or three parts green and one part blue). You will need less coloring if you are using gel coloring. Whisk each portion until color is completely incorporated.
Divide batter evenly into prepared pan, filling one row of cavities with each color of batter.
Bake for 8-10 minutes, until cakes spring back when lightly pressed and a toothpick inserted into the center comes out with only a few small crumbs attached.
Allow cakes to cool in the pan for 10 minutes, then turn out onto a wire rack to cool completely.
Makes 6 mini layer cakes


Moss
March 14, 2014Gah! I am in love with these. So cute! And pretty simple thanks to your great instructions. Thanks for the St Paddy’s day inspiration!
Joshua Hampton
March 15, 2014This ombre cake looks very pretty. I also like how small they are. A great way to control portions, I suppose.
kelley {mountain mama cooks}
March 16, 2014These are adorable. What a fun idea.. I love that you used a cupcake tin, genius!
Jennifer | Jennifer Bakes
March 17, 2014These are too cute!! I didn’t want to do anything green this year so went with another Irish favourite: Guinness!
http://jenniferbakes.blogspot.ie/2014/03/happy-st-patricks-day.html#.Uyb0pV7N6LI
Shikha @ Shikha la mode
March 17, 2014So cute, and amazing photos – I love mini things!