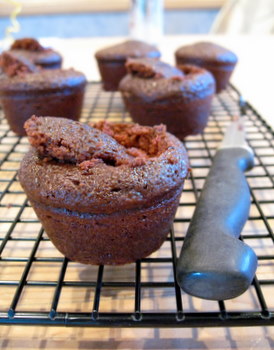
“Filling in the cupcake” should be an expression in the same vein as “icing on the cake.” Both are added bonuses that you don’t need, but can take a treat to the next level. Icing is a bit more common than filling and since it may not be something you do every time you bake, I put together this photo tutorial to give you an edge the next time you give it a try – like if you decide to go for a batch of Devil’s Food Cupcakes with Vanilla Cream Filling, for instance.
There are several ways to fill a cupcake with jam, cream or some other type of filling. The easiest involves cutting the cupcake in half and spreading it with the filling, treating the cupcake as though it were a tiny layer cake. It is effective, but doesn’t give you the classic “look” of filled cupcake. A slightly more sophisticated way is to put your filling into a pastry bag fitted with a metal or plastic tip, poke the tip into the center of the cake, and squeeze in a bit of filling. This method is quick, but tends to leave only a small amount of filling in place.
My favorite way – and, in my opinion, the best way – is the method I used for the Devil’s Food Cupcakes. It gives you the maximum amount of filling and the best overall look for the cupcake. All you need is a paring knife, or other small, sharp knife with a narrow blade, to begin. Insert the knife into a cooled cupcake at an angle, halfway between the center and the outside edge.
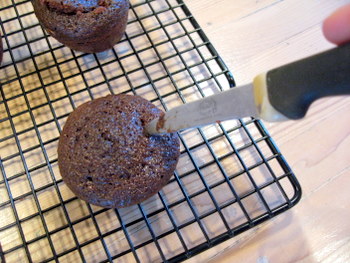
The exact angle isn’t crucial, but it should be around 45 deg., and the knife should go into the cake about 1″. The idea here is to cut out a circular cone of cake.

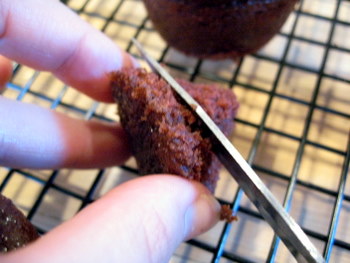
Once you have your cone of cake, remove it and slice off the pointy end of the cone, leaving just the circular base (which was the very top of the cupcake). The filling will be put in the hole once filled by the cake cone, and the circular piece will be used as a plug to seal the filling in.

Filling should be added using a pastry bag or (my favorite) a ziploc bag with the corner cut off. There is no need to use a pastry tip to fill the cupcakes; a medium-sized opening in either type of bag will make filling the cakes a breeze.

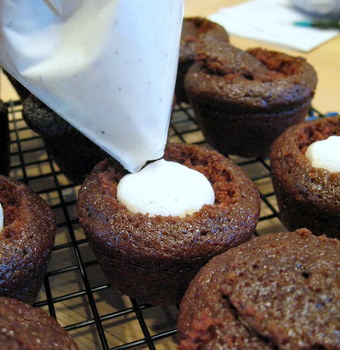
Once the filling is in place, just pop the flat circle of cake back into place and continue to frost as you would with any other cupcake. You can see what the finished cake, sliced in half to reveal the cream filling, looks like here.


emma
March 5, 2011This will be a little hard with only one hand available (I just got stitches) but I can’t wait to try it with my homemade raspberry filling in chocolate cupcakes with raspberry swirl icing!
Brittany
March 7, 2011Thanks so much for this! I’m sure the special tools everyone is mentioning in the comments are handy, but this method is perfect for me since I don’t bake enough to warrant spending money on specialty items. So glad I found this tut 🙂
TriciaD
March 17, 2011This is GREAT!!! Thank you so much for sharing your method and the pictures, too! You did such a good job explaining how to do it all and really, your step-by-step photos really do make a difference! I am just getting into baking cupcakes and wanted to know how to fill them.
I can’t wait to try this! 😀 Thanks again, so much!
casey
May 19, 2011i am going to be making cupcakes for my sisters wedding- was wondering if filling would be a good idea for them or not?! and what flavors too
Heather
July 27, 2011I just did this, and I am NOT a good baker/cook (In high school, my food caught on fire, and the fire department had to come and evacuate us) I did devils food cake, with marshmallow creme inside, and s’mores icing on top. They are really good! Thanks for posting this so I knew how to get the filling inside! (The last time I tried this, I didn’t realize you can’t put the filling in and then cook them! lol, that was quite the mess!)
Michele
January 4, 2012This was great! My son wanted these for his birthday party and i was clueless! this was helpful and he is HAPPY!
Thanks!
Jasmine
July 11, 2012Well, guess my family is having yummy cupcakes for dessert! Thanx for this! Very helpful
Margie
December 6, 2012Howdy just wanted to give you a quick heads up.
The words in your content seem to be running off the screen in Internet explorer.
I’m not sure if this is a format issue or something to do with browser compatibility but I figured I’d
post to let you know. The design look great though!
Hope you get the problem resolved soon. Many thanks
Nicole
December 6, 2012Margie – Thanks for telling me. What browser are you using, so I can check it out?
Joey
May 2, 2013Love this technique. Thanks for sharing!
Cami
February 13, 2014BRILLIANT!! Thank you. Making cannoli cupcakes for Valentine’s Day and this is going to help a ton. You rock! Thank you 🙂
Connie
November 9, 2014I can’t wait to try this. I have watched cupcake wars and love it! I always thought you had to have a special scooper to re move cake after you baked it. I tried it with a guavas and didn’t have much luck so I wasn’t too happy with the results. Your way will work………….thanks a lot.
Ilana
August 6, 2015I just made a slit with a knife then filled using a medicine syringe. Perfect and easy.