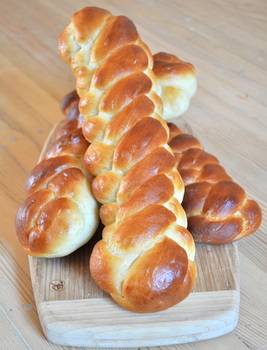
Challah bread is typically braided, whether you are making one that is plain or one that is packed full of raisins. You can treat the dough like any other bread and put it in a loaf and or simply shape it into a round, but the dough is very easy to handle and the finished braids are so beautiful that it is worth putting in the time to do it right.
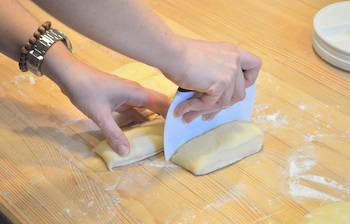
The first step is to prepare your dough and let it rise until it has doubled in size. Use a recipe for plain challah or raisin challah. Turn out your dough onto a lightly floured surface and gently deflate it, flattening it into a square or rectangle. Divide the dough – using a bench scraper, a knife or a pizza cutter – into evenly sized pieces, one for each strand you’d like your braid to have.
How to Make A Three Strand Challah Braid
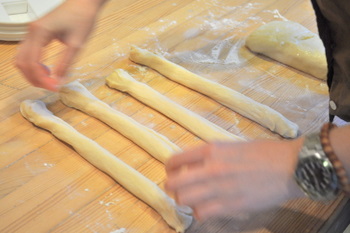
A three strand braid is typically the easiest braid to make because this braid is often used to braid hair, and is a pattern that most people are familiar with. For this braid, divide the dough into three strands and stretch them out carefully until they are of an even thickness all the way down. Start your braid from the center of the strands to give both ends of the loaf a finished look.
Take the left strand (1) and cross it over the middle strand (2).
Take the right strand (3) and cross it over the middle strand (2).
Repeat crossing left (1) over center (2), followed by right (3) over center (2) until you reach the end.
Pinch the ends together to seal the loaf, then repeat the process going up the rest of the dough. There is no need to keep track of which strand was originally number 1,2 or 3 as you go because the pattern is the same the entire time.
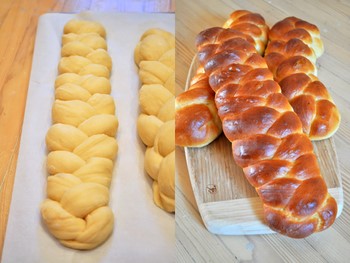
How to Make A Four Strand Challah Braid
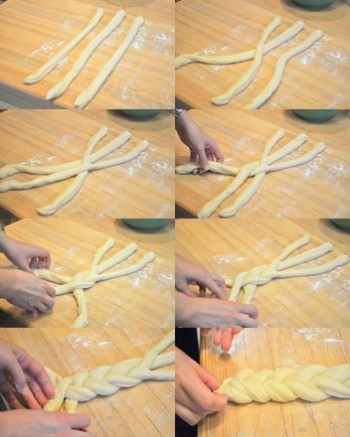
A four strand braid is only slightly more complicated than a three strand braid. Just as with the three strand, I am using numbers 1-4 to describe the strands. It is not important which strand was originally number 1, etc. As far as braiding goes, number 1 is always the left-most strand of dough.
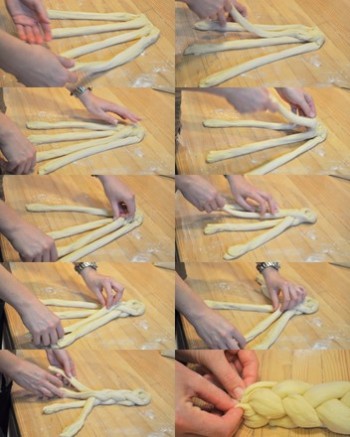
To make the braid, pinch the ends of four strands of dough together at one end.
Cross strand 1 over strand 3.
Cross strand 2 over strand 3.
Cross strand 4 over strand 2.
Repeat until you get to the end of the strands. Pinch all loose ends together.
How to Make A Five Strand Challah Braid
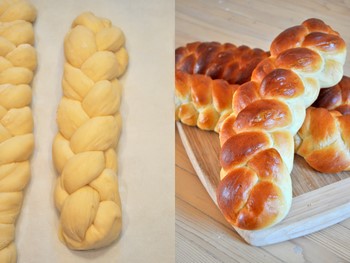
Once you have a four strand braid down, a five strand braid is a piece of cake and you will have a very beautiful loaf (pictured at the top of this post) for your efforts. Again, tt is not important which strand was originally number 1, etc. As far as braiding goes, number 1 is always the left-most strand of dough.
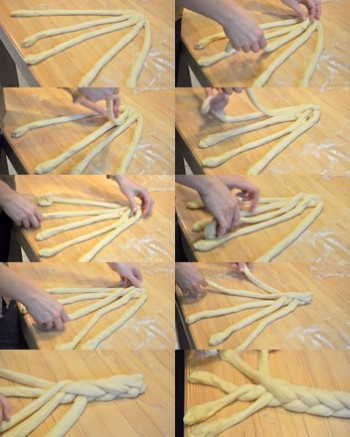
To make the braid, pinch the ends of 5 strands of dough together at one end.
Cross strand 2 over strand 3.
Cross strand 5 over strand 2.
Cross strand 1 over strand 3.
Repeat until you get to the end of the strands. Pinch all loose ends together.
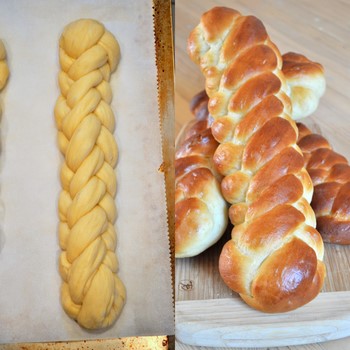
Transfer your braided loaf to a baking sheet to rise once more before baking according to your recipe’s directions.



Sue
September 16, 2010Your breads are beautiful! Thanks for the tutorial.
Kitchen Corner
September 16, 2010WOW! This is very pretty! I love to try it out. I like the four strand pattern.
Nadja
September 17, 2010There’s also a two-braid version which is the one best-known for the Swiss Züpfe.. but I’m going to have to try the five-braid one out!
Scott at Real Epicurean
September 17, 2010I’d love to make my own bread today…if I hadn’t just had to bin all my flour for weevils!
Susie
September 17, 2010Thank you for including the four and five strand braids in your tutorial. I have wanted to try to do more than three strands and can’t wait to try it.
Brenda
September 17, 2010This is a wonderful post. Thank you for the demonstration. I love the look of the dough after the final sitting, and the baked loaves are just fantastic. I am definitely going to make this in the near future!
Becca@Baking Monster
September 17, 2010Love tht you did a updated online version on how to braid because some of the old books i have are hard to tell what their doing in the black and white photos.
Betty @ scrambled hen fruit
September 17, 2010This is a very helpful post- all of the loves are just beautiful!
Joy
September 20, 2010Thanks for the tutorial. I wondered how to do it, without breaking the dough.
Alanna
September 24, 2010Great tutorial, Nic and great timing too. I’ve only made three-strand braids, I’m intrigued that with one of your braids, you started in the center and worked outward.
Duby
December 15, 2011wow!! these are GORGEOUS !!!! i do a 4 braided Challah (slightly different) but i am definitely going to try your 5 braid … its funky!!! (it reminds me of lanyard we used to do in summer camp…..
Saul
May 22, 2015I used to work in a bakery where we made five-braid challah. I lost my instructions and found I had forgotten the sequence. I think yours is the same, but as always, it gets confusing which strand is which number. The crossing over of the interior strands is the tricky part. I made one that almost came out right. If you could clarify the numbering of all the strands, and label them in the photos, it would help. Also, define the moment at which the number reverts. Is it after you cross 5 over, or the next step, and how many braids are being passed over. It’s quite hard for older brains!