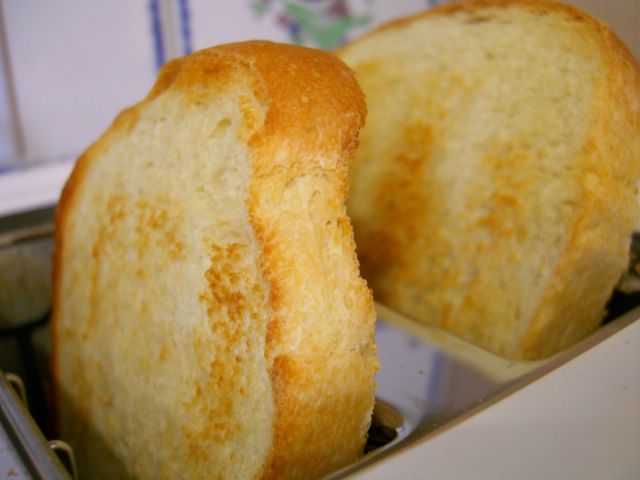
Flipping through Baking with Julia, looking for the perfect recipe to continue to improve my culinary skills, I stopped at a beautiful photo of toast. Normally toast would not catch my attention in such a way, but not many recipes claim to produce nearly ideal toast. I was sold.
I am not that great a shaping bread. I am getting better at shaping round loaves, but most of the time my breads don’t hold their shape as well as I would like. I think that in the back of my mind I always thought that, to produce a loaf shape, you could simply plop dough into a loaf pan, let it rise and bake it. Not so. Shaping is the key to this loaf.
The bread itself came together very easily. The recipe suggested that I make it with my mixer, but I did it by hand. This entailed rather more kneading to work in the butter, but it was enjoyable work.
After the first rise, I divided the dough in half. I rolled it out into a 9 inch wide x 12 inch high/long rectangle. Fold one third of the dough down, then fold it down again. Pinch the bottom seam to seal. Your rectangle should be approximately 9×4 now. Turn the seam side up. Fold each end over about 1/2 inch, tuck in any loose ends and pinch to seal. Place the loaf seam side down into a greased 8×4 inch loaf pan. The seams sealed easily, so don’t use too much flour as you need. The dough should be neither sticky nor dry.
Low and behold, the loaf looked just like a store bought loaf when it came out of the oven! To my mind, this meant that I had shaped it properly. Fortunately, it tasted nothing like a store bought loaf. It was soft, buttery and had a nice even crumb that made it very easy to slice. And it made crispy, perfect toast.
Classic White Bread
adapted from Baking with Julia
2 1/2 cups warm water (105-115F)
1 package active dry yeast (.25 oz)
1 tbsp sugar
6-7 cups ap flour
1 tbsp salt
4 tbsp butter, softened
Combine 1/2 cup water, yeast and sugar in a large bowl and let stand until foamy – about 10 minutes. Add remaining water, flour and salt to yeast mixture and mix with a wooden spoon (or in a mixer) until dough cleanly away from the sides of the bowl. Knead in butter until dough is smooth and not sticky. Turn dough out onto a lightly floured surface and continue kneading for an additional minute or two. Shape dough into a ball and place in a lightly oiled bowl to rise until doubled, about 1- 1 1/2 hours.
Butter two 8×4 inch loaf pans and set aside. Place dough on a lightly floured surface and divide in two equal portions. Shape as described above and place seam side down into prepared loaf pans. Cover loaf pans lightly with oiled plastic wrap and allow to rise until doubled in size, about 1 hour. Dough will rise above the lip of the pan.
Meanwhile, preheat oven to 375F.
Place loaves in oven and bake for 35-40 minutes. After 35 minutes, use an instant read thermometer to check the internal temperature of the bread. It will read 200F when the loaves are done. If you do not have an instant read themometer (meat thermometer), simply cook the loaves for 40 minutes and keep an eye on your oven thermometer to make sure the temperature remains constant.
Remove loaves from pans immediately and let cool completely (2-3 hours) before slicing.
Makes 2 loaves
The book recommends storing the bread in a brown paper bag at room temperature for up to two days, or freezing the loaves. Storeage was not an issue here.


Moira
June 16, 2005Isn’t this a fantastic recipe? I love your shot of the toast, too Nic!
Clare Eats
June 16, 2005I think thats my problem, the thermostat in my oven is broken so I can’t get an even constant oven temp. it sucks. The bread looks awesome
Nic
June 16, 2005Moria – Thanks for the compliment. I will be using this recipe again, for sure. I bet it makes great french toast.
Clare – I’m so sorry! My oven is tricky, but now that I have a thermometer that is reliable, my baking is much more consistant.
farmgirl
June 19, 2005Lovely job with the bread! There is nothing that compares with a simple slice of homemade toast. I am always surprised by that divine aroma wafting out of the toaster while I’m waiting, waiting, waiting. . .
Nic
June 19, 2005Thanks, farmgirl. It’s always struck me as odd that toasting bread seems to take such a long time. I mean, the whole process takes about a minute, but when you’re waiting for toast it seems like an eternity.
Anita
August 10, 2006I tried your recipe with white as well as whole wheat. Both turned out great. I have blogged my results. Thanks.
Nandita
August 23, 2006Nic,
Wanted to ask if I can try out with half the quantities and try baking a single loaf, as I havent baked bread before. Will it work out?
Nic
August 24, 2006If you have never baked bread befor, I strongly recommed making recipe as written before trying to modify them, at least until you get a feel for breadmaking.
Anjali
December 5, 2006I’m baking tonight. Restless
neal
January 5, 2008great recipe, i added corn and garlic and cheese and cooked at 450 in a preheated cast iron dish covered for 30 min. and then anther 15 or so uncovered. thanks for such a great foundation
Aila D.
June 14, 2009I loved this recipe, and have had it bookmarked for a while, but I only got around to making it last night. First of all, it was exactly what I was looking for, because I’ve been looking for a bread that has a similar look and feel to store bread (but of course tastes better), and this achieves this perfectly! Additionally, I actually put it in the refrigerator overnight for the first rise because I started baking a little later than I meant to, and it still came out perfectly the next day. Thanks for such a wonderful recipe!
patty
September 8, 2010This is a fabulous wonderful recipe. I had been laboring over 100% whole grain breads all summer and kneading this light lovely bread was a huge treat! I was worried that I did not have 2 8×4 pans and had to use one larger one, but it just rose and rose so high it was not a problem. I used Red Star Rapid Rise yeast. I also put in just one cup of white whole wheat and one cup of regular whole wheat with 4+ cups of unbleached white flour. Will make again. Thanks!
Shea
October 3, 2011I love this recipe! I made a normal loaf and I braided one and topped with a little garlic powder and diced onion. Both are fantastic. 😀 Thank you so much for posting this recipe.
kaytlen
April 23, 2015Just wanted to thank you for this recipe. I now bake this bread at least once a week for the family as they prefer this to store bought bread. And, I also like it. Very soft and yummy just with butter.
Errol
October 5, 2016Thanks for the recipe. I like to substitute about 1/2 the flour with Wholemeal Flour to make my own 50:50 bread and it is gorgeous.