
When I bought my new place, it hadn’t been updated in decades. While previous residents had made small changes, such as replacing the carpet, installing some chair rail in one room and putting up new layers of wallpaper, not a single person had touched the kitchen and all the appliances were original to the time of construction in 1964. Appliances are important to me and they probably are to you, too. You want a refrigerator that keeps your food fresh and doesn’t cost a fortune to run. You want an oven that holds an even temperature and bakes evenly. You want a dishwasher that will make cleaning up easier. And you want a cooktop that looks good and works well.
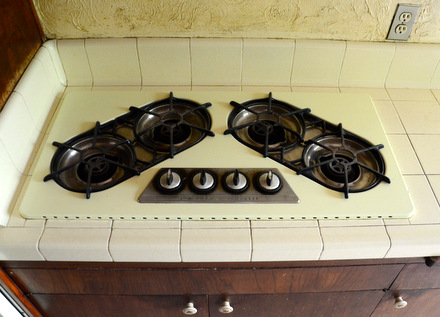
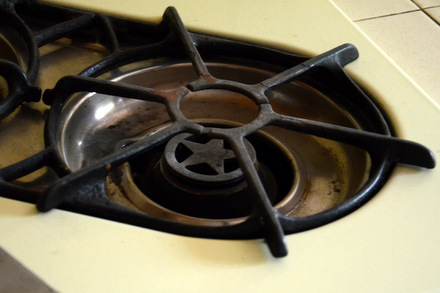
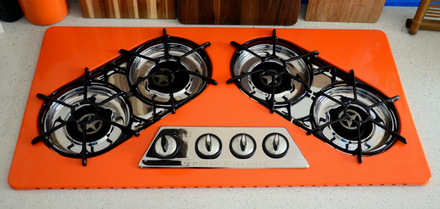
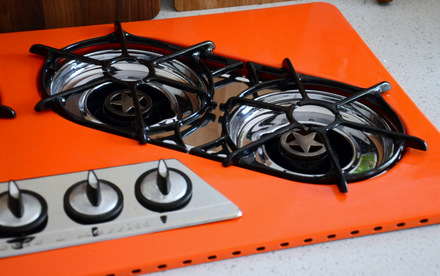
My pre-renovation kitchen didn’t come with any appliances I wanted to keep except one: the cooktop. The gas cooktop was an O’Keefe & Merrit built in 1964. O’Keefe & Merrit is a fantastic brand known both for its quality and good looks. Restored versions of their ranges, which often have a lot of chrome on them, are popular for bringing a vintage touch to a modern kitchen. My cooktop was 36-inches wide and had four large burners, each of which had a chic star at the center of it. Most importantly, it worked just fine. Instead of replacing the cooktop, I decided to have it refinished and brought back to its former glory.
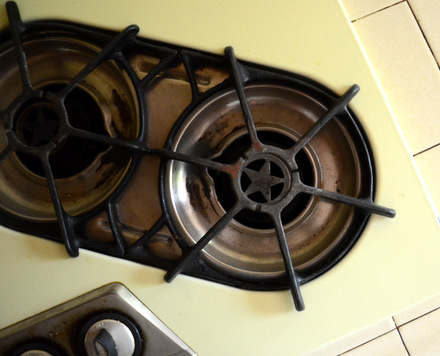
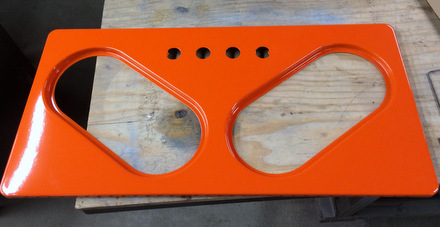
The cooktop was filthy when I started this project and I wouldn’t even want to hazard a guess as to when it was last cleaned (or even last used) by the previous owner. It was a shade of “almond” that was, of course, one of the colors that the porcelain-finished cooktop was originally available in. Beyond cleaning it up, I wanted to give it a fresh look to make it pop and become a focal point of the kitchen.
I wanted it to be a bright, vibrant, retro color. I wanted it to be orange.
Now, I know that orange was not a color that this cooktop (or, perhaps, any cooktop) was available in at the time. Almond, pale yellow and mint green were much more in vogue and were stock options for this cooktop, but I wasn’t going for authenticity and had no intention of ending up with any of those colors in my kitchen.
To change the color of the cooktop, I needed to have a re-porcelained. This process essentially involves sand blasting the existing porcelain enamel off of the metal base, then giving it a fresh coat. It’s not a particularly difficult process, but I had one big problem: finding a place that could give me the orange color I was looking for. If I had wanted white or black, it would have been easy because those colors are avilable just about everywhere. Due to air quality control restrictions in California and many other states, porcelain enamels that contain colors like red and yellow are completely unavailable. I looked far and wide, in state and out of state. I called dozens of places and was just about to give up hope when I found Independence Porcelain Enamel.
When I contacted Independence Porcelain, I asked what colors porcelain colors they had available and – much to my surprise – they asked what color I was looking for, rather than giving me the same short answer that most other places did (black). They had just the vibrant orange that I was looking for, as well as a stunning turquoise and a rainbow of other colors, and they were able to e-mail me pictures of the various colors they offered. They told me that bright, retro colors were very popular with customers refinishing the kitchens in classic Airstream trailers, too. Luckily for me, their prices were also very reasonable, so I packed up my cooktop and shipped it right out. The process did not take long (a couple of weeks from the day I sent it out) and I also had them re-porcelain all the metal grates that were a part of the cooktop. Everything came back looking brand new and the color was absolutely perfect.
The other thing that the cooktop needed was to have the grease trays and other accent pieces re-chromed. As the name suggests, these trays exist to catch any drips that may fall from your pans as you cook. They are removable so that they can be cleaned thoroughly and easily. Chroming is a bit easier to find than porcelain enameling. There are lots of car and motorcycle shops that offer chroming, as well as stores that specialize in refinishing vintage cooktops. The company I went with took months (long story, not worth retelling here) and I wouldn’t recommend them, so call around or visit in person.
My gas cooktop was very straightforward to reconnect to the gas once my kitchen was ready. A plumber that has plenty of experience with gas appliances should be able to help you out, but there are also stove specialists that can be called in if, for instance, you find you are missing a couple of small parts here and there.
When considering a restoration project like this one, be sure to take your time. I had the cooktop refinished – but not reinstalled – long before I was ready to use it. In fact, it was one of the first projects that I undertook in my kitchen renovation. Not only did I want to ensure that the restoration was done well, but I needed it to measure the cutout in the countertop to ensure a good fit. I love the way it looks in my (mostly) white kitchen, as it creates a completely unique focal point. The color may be a bold choice, but it fits the cooktop and the overall design of my kitchen, so I am glad that I held out for the color I wanted.


Cheryl
March 4, 2016How did you upgrade or clean the knobs?
Nicole
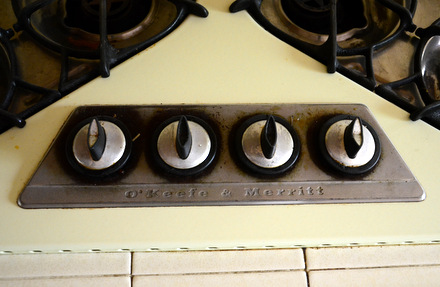
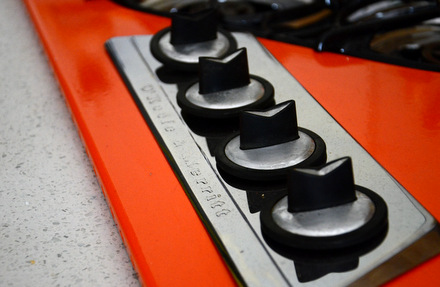
March 4, 2016Cheryl – Good question! With the knobs, I literally just had to clean them extremely well with dish soap and a stiff scrubbing brush. They’re actually made of plastic, unlike the rest of the components, so they couldn’t be completely redone. One of them was broken and I spend a while searching through a bin of O’Keefe & Merrit knobs at a vintage store to find a matching replacement!
The plate behind the knobs was re-chromed, so it looks brand new and that really helped the overall look of the knobs.
Rachel
March 5, 2016This looks amazing – great job!