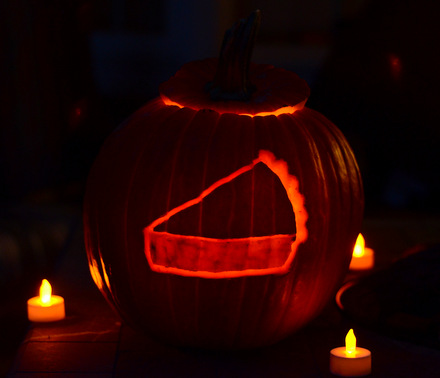
I love a classic jack o’ lantern as much as the next gal, but I also love a creatively carved pumpkin and usually try to make at least a couple of more unusual designs when I am carving pumpkins for Halloween. This year, I wanted to create a pumpkin carving that was a tribute to my favorite pumpkin dessert – so I carved a slice of pumpkin pie.
This is a very easy carve to do, though it does involve sculpting a pumpkin instead of carving straight through it. When I say sculpting, I mean that you will need to carve partially through the outer skin of your pumpkin, creating a surface that light can shine through without making any holes. It is easier than it sounds, especially with a design like this one.
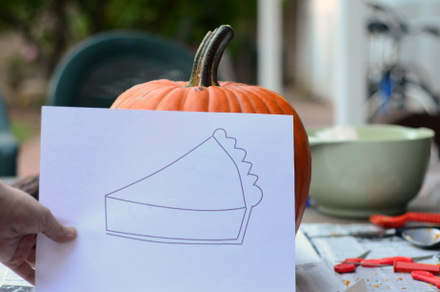
I started my pumpkin with a template, and you can download it here. Just resize the image to be as large – or as small – as your pumpkin. You’ll notice that the image has curved lines, rather than straight ones, and this is to accommodate the curve of the surface of the pumpkin. Clean out the interior of the pumpkin and you’re ready to begin.
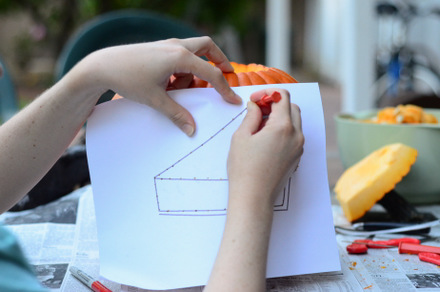
First, hold the template up to the pumpkin and use a toothpick, skewer or other pointy object to mark the lines of the template on your pumpkin. I find that this works better than trying to draw the template onto the surface of the gourd. Use a small knife to connect the dots and give your shape a clear outline. Once the outline is done, start to make your lines wider, scraping them out with your knife to give the pie nice definition.
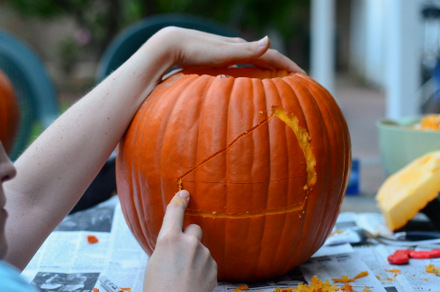
The crust should be the deepest section that you carve, since you will want it to let the most light through. You will want to go over it a couple of extra times, scraping out the pumpkin flesh with a small knife or spoon, rather than trying to cut it out in chunks. The surface should be smooth and relatively even.
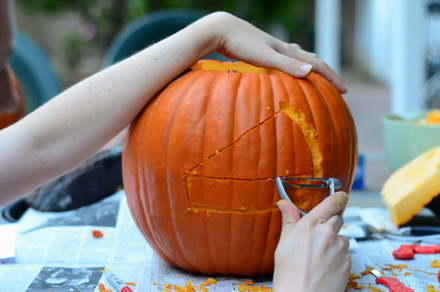
Once the crust is carved, you can use a potato peeler (or a knife, if you are careful) to remove the outer skin of the pumpkin from the pie filling area. Leave the skin on the top of the slice of pie in place.
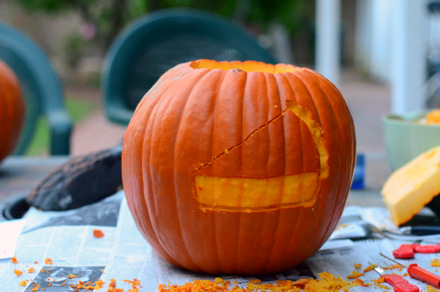
At this point, your pumpkin is just about ready. For the finishing touches, you should place a candle or bright light into your pumpkin to see how much light comes through your design. I often take a pumpkin scraper or a metal spoon to thin the interior wall of the pumpkin once the carving is completed. The thinner the wall, the more your design will stand out!!
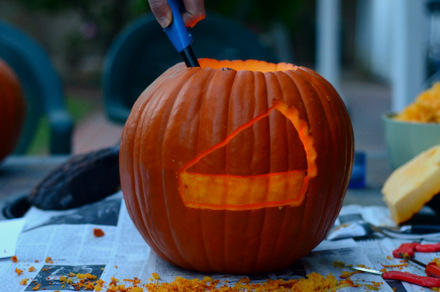
Just one final note: You can save the seeds from your freshly carved pumpkin and roast them up in the oven for a snack, but the pumpkins used for carving are not usually the type that are good for actually baking into a pie. If you want to make a pie using fresh pumpkin, look for a sugar pumpkin and make your own pumpkin puree. Happy Carving!!



Alexandra Jade
October 22, 2014I love it and it totally feeds my pumpkin pie addiction. haha