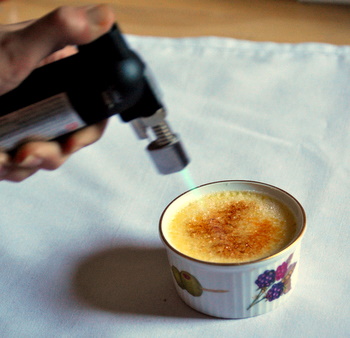
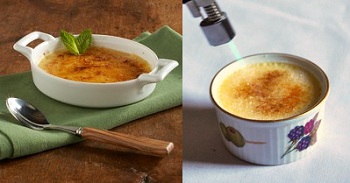
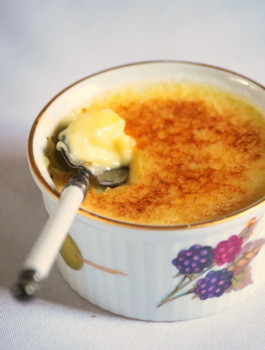
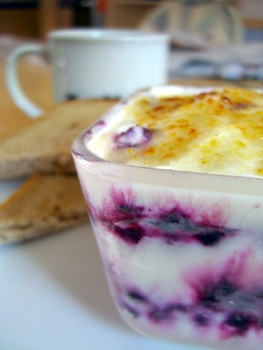
The first time I tasted a cannele, the French pastry that is often referred to as a hand-held creme brulee, I was completely underwhelmed. The wonders of these pastries are frequently extolled by food writers and the rubbery, bland pastry I tasted was surely not worth more than a single word: bad. I tried many more, some better than others, but they never lived up to their hype, not at French bakeries, not at gourmet stores, not at restaurants “known” for them. Disappointed, I decided that the only way to really know whether a cannele was a dessert worth all the work was to make it myself. If it wasn’t any better, than I must not be someone who likes canneles in spite of their reputation.
I have since decided that unless you camp out at a bakery and run into the kitchen to eat these as soon as they come out of the oven, the only way to enjoy them is to make them at home. My homemade canneles had a crisp-chewy caramelized sugar crust and a smooth, custardy center that was definitely reminiscent of a creme brulee – albeit one with a lot more texture than usual! They are unique and very tasty.
Canneles are not something that can be whipped up quickly. The batter is easy to make, but must be prepared in advance and refrigerated for 24-36 hours before baking. Normally, cannele are baked in special copper molds that give them a signature look. These molds are pretty pricey, but luckily the cannele can be baked in muffin cups, too. This is one instance where I would strongly recommend using silicone (or buying silicone cannele molds) because these take nearly two hours in at 400F oven to form their caramelized crust, and it will stick to anything that isn’t extremely well greased. Traditionally, cannele molds are lined with beesewax to give them a clean release. Silicone needs no prep and you won’t end up with an overly chewy (or waxy-tasting, as some I’ve had have been) outer layer on your pastries.
I used a Paula Wolfert recipe for these and had great success with it. Prepare it the night before you want to bake and bake these the same day you want to serve them. They’ll still have the same flavor the next day, but they are at their very best when served still warm from the oven, with the contrast between crust and custardy center at its most distinct.

+Continue Reading

It’s always nice to be able to cook and eat a hot breakfast, but sometimes I just want something very quick and easy to start my day. This simple yogurt parfait is one that I come back to again and again. It’s easy to make, subject to all kinds of variations and is perfect for a single serving, although it can be made for a larger group and spooned out of a big dish, as well. It’s so easy that I hesitate to call it a recipe, in fact. I rarely measure anything that goes into it and, instead, just wing it as I go.
The recipe uses plain or vanilla yogurt and frozen berries. I will use fresh berries when I have them, but frozen berries are available all year round and still deliver great flavor. In fact, they actually meld into the yogurt a bit better as they defrost, giving the parfait a more uniform texture. The interesting thing about this parfait is the brulee topping. Much like a creme brulee, the finial layer of yogurt is topped of with a generous coating of sugar that is caramelized using a kitchen torch. The crispy topping adds a nice texture, and the sugar adds a hint of caramel flavor to the whole dish. Plus, it gives me an extra excuse to use my kitchen torch!
The parfaits can be made in advance and refrigerated before serving, if necessary, but the topping is best when it is fresh so be sure to save the sugar for serving.
+Continue Reading
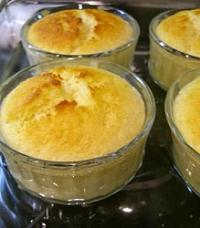
Ramekins are one of the few baking dishes that actually have their own name, setting them apart from generic sounding “cake pans” and “baking dishes.” Ramekins are small, cylindrical dishes that are used for baking individually-sized dishes. They are ideal for baking small souffles, as their straight sides make it easy for an egg white-based souffle mixture to rise up the sides of the dish and gain a lot of height, as well as for baking individual desserts, since they offer built-in portion control. I’ve use them for little pudding cakes and baked egg cups, and have also used them for chilled desserts, such as panna cotta and chocolate mousse.
Ramekins can be made out of any heat-proof material, and are most often made out of porcelain, pyrex or something similar. They can come in any size, but are most often found in 4-, 6- or 8-ounce volumes. Some will have very shallow sides, but most have a rise of about an inch or so, depending on the size of the dish itself.
Their small size actually makes them useful for applications outside of the oven. For instance, they’re often used when a cook is doing prep work in the kitchen, separating chopped ingredients into individual dishes to be used at a later time. They’re also a nice way to present side servings of dressings, sauces and dips, like the au jus for a french dip sandwich.