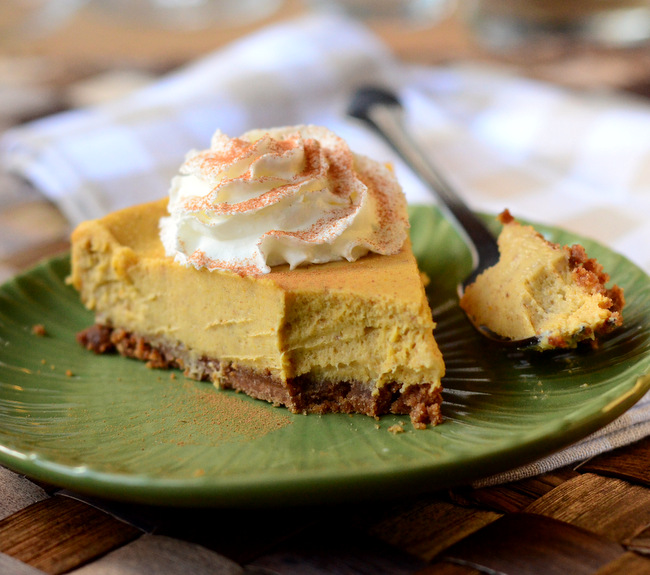
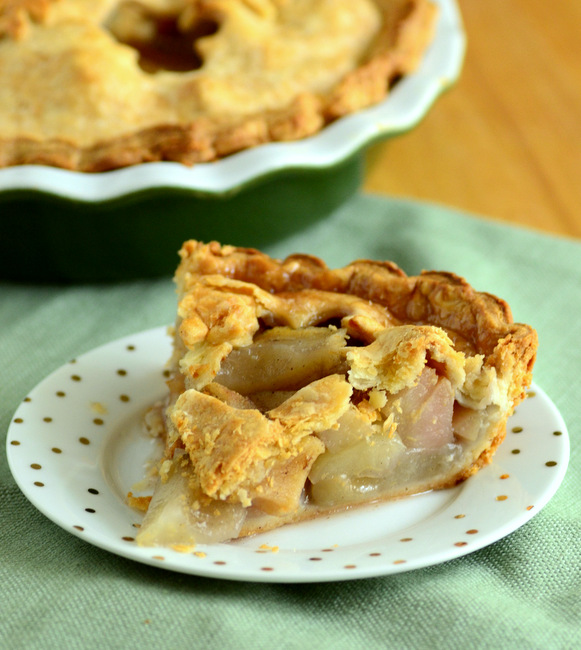
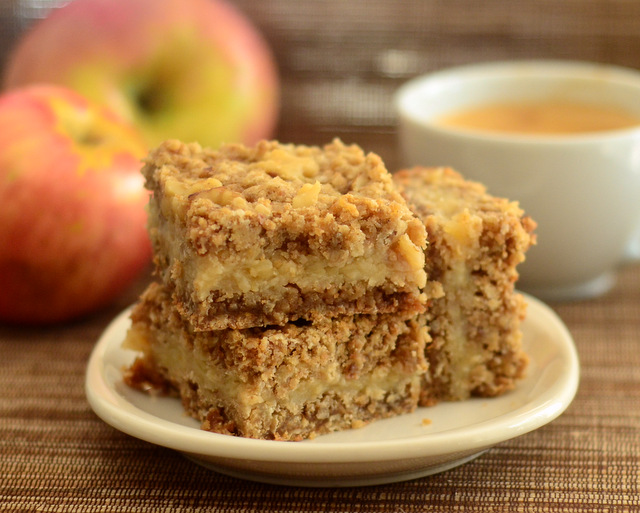
The High Heat Turkey Method

The High Heat Turkey

There are more ways to cook turkeys for Thanksgiving dinner then there are turkeys being eaten on the last Thursday in November. Everyone - and their mother - has a strategy and the vast majority of them involve the turkey being in the oven for at least a few hours. I don’t think that there is only one perfect way to cook a turkey and so I am very open to trying new methods when I am ready to roast a big bird. I try to aim for a crisp (or at least not soggy) skin, relatively moist breasts and moist, tender dark meat. My usual method of high heat to start followed by a slow roast at a lower temperature works pretty well, but this year I decided to try an ultra-high heat cooking method to see how the turkey would turn out.

The high heat method, which I’ve mostly heard about as a good option for roasting chicken, not turkeys, calls for cooking a turkey at a high heat the entire cooking time. In theory, this seals in the juices while producing a crispy skin - and gets the turkey done in as little as 90 minutes! I skimmed through some of my past notes on the subject and decided to go with an old New York Times article as a guideline. I popped my turkey into the oven at 500F and sat back to watch it cook.

(more…)

How to make spiced apple cider

Spiced Apple Cider

Apple cider is a type of unfiltered apple juice made from pressing ripe apples to remove the liquid from them. It looks quite different from regular apple juice, which is filtered and is completely clear, because it is cloudy as a result of having apple particles still suspended in it. Many fans of cider will tell you that it has more flavor to it than regular apple juice does. It can be served chilled, but one of the most popular - and most delicious - things to do with a batch of apple cider is to spice it and serve it heated. It’s great for warming you up on a cold day when served this way.

Spiced cider. also known as mulled cider, can be made in a number of different ways with a number of different spices. To make spiced apple cider, add some cider to a medium or large saucepan (depending on how much or how little cider you want to make) and add in some whole spices to it. Use cinnamon sticks, whole cloves, star anise and a bit of nutmeg. I actually don’t use very much nutmeg, so I’ll generally add in a sprinkle of ground nutmeg. Bring the cider to a boil, the remove from heat and let the cider steep with the spices in it for 15 minutes or so. Strain out the spices and reheat before serving.

If you don’t have whole spices, you can use small amounts of ground spices, but you should keep in mind that you won’t be able to strain them out easily and they’ll probably just sit at the bottom of the glass when you go to serve the cider.

Snowy Village Cakelet Pan

Snowy Village Cake Pan

Gingerbread houses may have some competition this year for edible Christmas decorations. Williams Sonoma has just released a new, limited edition Snowy Village Cakelet Pan for the season. The pan bakes up six small cakes in the shapes of show-covered fairytale homes. The cast-iron pan is made by NordicWare (as are just about all of Williams Sonoma’s special edition pans), so it’s a heavy-weight pan. It also has a nonstick finish to help preserve some of the details of the cakes when you release them onto a cooling rack before baking.

Most cakes are going to look cute on a cake stand, these cakes can actually become part of your decor. You can set them out at the beginning of the evening during a holiday event and leave them out to be admired before serving. They don’t need much decoration, but a dusting of powdered sugar will give them some “snow” and a few dots of colored icing and you’ll have a string of Christmas lights going around the entire village!

“I vant a cupcake” Halloween Pumpkin

“I vant a cupcake” Halloween Pumpkin

Last year, I decided to try to incorporate food into one of my Halloween jack-o-lanterns in addition to the usual array of scary, smiling pumpkin faces. It worked out well and I came up with a creepy skeleton hand holding a cupcake. This year, I wanted to try my (non-skeleton) hand at incorporating food into my pumpkin carving again. I considered trying to go with a slice of pumpkin pie, or some other pumpkin dessert, but ultimately decided that the cupcake would be an ongoing theme. This year’s pumpkin is called “I vant a cupcake.”

It was inspired by my Vampire Cupcakes, showing a fanged pumpkin face about to dive into a moist, cherry pie-filled cupcake and ready to suck up the filling. This is one of my first attempts to sculpt a design into a pumpkin without actually cutting straight through the pumpkin itself. I used a zester that had a large opening for making twists (to garnish drinks) to carve away the outer rind in the area I wanted to put the cupcake, then used regular pumpkin carving tools to cut away the rest. I free-handed the whole design, so I can’t share a template, but one tip that will help you is to thin the pumpkin wall from the inside. A thinner wall will not only be easier to carve, but it will let more light through if you decide to try and sculpt your design.

“I vant a cupcake” Halloween Pumpkin, unlit

I’m including a detail of the cupcake below, if you want to take a closer look at how I carved it out. I tried to make the outlines and lines of the wrapper deeper and brighter, while keeping the frosting more rounded and billowy. (more…)

Bone Chilling Ice Cubes

Bone Chilling Ice Cubes

One of the first food-related, creepy Halloween things that I learned to make was a big ice hand to float in a bowl of punch. You make this by filling up a latex (rubber or similar) glove with water, tying it off like a water balloon and freezing it, then peeling the glove away when you’re ready to use the ice hand. It looks neat floating in a bowl of punch, especially if you have some dry ice in there, too. The only drawback is that the ice hand is big and clunky, and not ideal if you’re going to be serving anything other than punch at a party. So, this year, I picked up some Bone Chillers, a silicone Skull and Bones ice cube tray.

I really like the shapes and the tray is just as easy to use as a hard plastic tray, since you simply peel back the tray to release the ice cubes. Even better is that this tray can double as a mold for other things, like candies, fudge, truffles, marshmallows or anything else that you might want to make into a little skull and bones shape. The only downside is that the tray makes just eight ice cubes at a time. I started two days ago, emptying and filling the tray again - not continuously, just when I had the chance - and now my icebox is full of cute and slightly menacing Halloween ice cubes!

I found these on sale at a local store and have seen them all over the place, even at bookstores like Barnes & Noble and Borders, so keep an eye out to pick some up (probably at a good price) before Halloween.

Bone Chilling Ice Cubes

Jack o Lantern Cupcake Pans

Jack o Lantern Cupcake Pan

While pumpkins fit perfectly into Halloween just as they are, jack o’ lanterns have an even more perfect fit because Halloween is really the only holiday where the carved pumpkins are showcased. There are lots of pumpkin-shaped baking pans, like the Pumpkin Patch Pan and the Mini Pumpkin Cheesecake Pan, but there aren’t a whole lot of pans that incorporate the jack o’ lantern face into the design, leaving you to rely on frosting to achieve a spooky look. Fortunately, there are a couple of great looking pans that have pumpkin faces molded right in, so all you need to do is bake and serve.

The pan pictured above is the John Wright Pumpkin Muffin Pan. It’s a cast-iron pan that has distinctly cut shapes and bakes six large muffins. It also works well for cornbread, especially if you like the “crust” that cornbread can get when it cooks in cast iron. Wilton makes two Jack o’ Lantern pans. The first is a Petite Jack-O-Lantern Pan, an aluminum pan that bakes bite-sized pumpkins and can be used for cookies or mini cakes. The second is the Pumpkin Faces Pan, which is made of silicone for easy removal of the muffins or cakes when they’re done, preserving their scary smiles without worrying about your treats sticking to the pan.