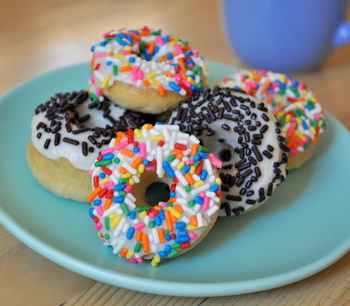
Baked donut pans started as a “novelty” item several years ago. While some of these specialty pans fade away after a season or two, the donut pans were a huge hit and are still a beloved addition to the kitchen of many bakers. Donut pans allow you to bake something completely different – a baked donut – that you can’t make in any other pan, while most novelty pans are simply designed to give a new look to an old recipe (not that there is anything wrong with that – I’m a sucker for fancy pans). Like other types of pans, there are a few tricks you can use to get the best results from your donut pans.
Use a recipe with a thick batter. Donut pans often come with one recipe attached to the packaging and it makes a stiff batter. Over time, you’re going to want to try other flavors, but don’t use a liquidy cake batter in your pan, as it will run over the top instead of rising. Thicker batters (with the appropriate amount of leavening) will rise up and give you a nice dome, giving your donut a perfect shape when you pull it out.
Fill the donut cavities to the top, or close to it. Filling your donut pans generously will give your donuts a better shape. It is better to have 10 perfect donuts than 12 so-so donuts, so leave a cavity open if you have to.
Use a piping bag to fill your pan. It is tricky to spoon batter evenly into a donut pan – and nearly impossible with a mini donut pan. Piping the batter in with a pastry bag or a ziploc bag with the corner snipped off will save you a lot of time and frustration.
Grease and flour your pan. Most donut pans are nonstick, but it is very difficult to slide a knife or spatula under a stuck donut to pry it out. Save yourself the trouble and grease and flour your pans in advance.
Do not overbake your donuts. Check your donuts for doneness a minute or two before the recommended baking time is up. Baked donuts have a tendency to be dry, so you want to have a few moist crumbs attached to your toothpick after poking it into the center of the donut. If your donuts are a bit drier, try using a glaze that has butter or cream cheese in it to add moisture, rather than a water/milk and confectioners’ sugar glaze. Large donuts typically take 15-18 minutes to bake. Mini donuts often take 10-12 minutes. The baking time will vary from recipe to recipe.

Know when to add your topping. Sugar-based toppings should be added while the donuts are still hot from the oven. While hot, steam is released from the donuts and helps the sugar adhere to their exterior. Glazes and frostings should be added when the donuts are completely cool. Cool the donuts on a wire rack.
Accept that baked donuts don’t taste exactly like fried donuts. This is the most common complaint I hear about baked donuts. This style of donut is different (and perhaps a big healthier) than its fried counterpart. Love it for what it is.

Bonus Baking Hack: To make a baked donut more like a fried donut, brush it with melted butter and roll it in sugar immediately after baking. The butter and sugar will harden into a crisp coating that is similar to the texture of a fried donut and the butter adds an extra layer of flavor. Used spiced sugars for different donut flavors with this technique.


JaneyQ
February 11, 2017The article, Baked Donuts 101, was very helpful to me. It clearly covered all of the issues that I’ve been concerned about. Thank you!
Mariana
May 21, 2018Thanks for the tips! Im going to have a bakery sale with both fried and baked donuts, and i was looking for advice of which kind of recipes are better for my pans.
Greeting from Mexico.