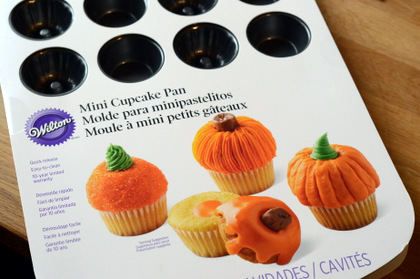
Pumpkin baked goods are a sign of the fall, as are pumpkin-shaped baked goods. You can test your sculpting skills with a sharp knife, or you can head to your favorite kitchen store and pick up a pan that allows you to make pumpkin-shaped cakes easily. The Wilton Mini Pumpkin Cupcake Pan caught my eye when I was out shopping for Halloween accessories the other day (found at a craft store, in the cake decorating section). The pan is designed to help you bake pumpkin-shaped mini cupcakes that looked almost too cute to eat on the packaging!

The pan is a nonstick pan that has a total of twenty four mini cupcake cavities. Half are shaped like a traditional mini cupcake, while the other half are shaped like mini bundt pans. These mini bundt shapes form the tops of the pumpkin cupcakes. The cavities are filled and baked, then the domed sides of each are leveled off, so that the two pieces of the finished cupcakes can be easily stacked together. I chose to grease and flour the bundt-shaped cavities and to use paper liners for the regular shaped cavities, so that I would be able to easily handle the cake bases when I was ready to serve my cupcakes.
Unlike many other Wilton pans, this one did not include a recipe with it. You can use a cake mix or any mini cupcake recipe that you might have. Of course, a pumpkin cupcake recipe (coming soon!) is a great choice, but these little cakes are mostly about the decorations and you can get away with using any flavor of cake that you like. The cakes released from the pan very easily and the shapes looked picture perfect. I would definitely use the pan just for regular mini cupcake baking and not just limit it to seasonal use. Who wouldn’t want to eat a bite sized bundt cake?

Both my mini bundts and my mini cupcakes domed slightly on top, so I trimmed them with a small paring knife to ensure that the pieces fit together properly. The bundt-shaped pieces fit neatly on top of the bases once everything was trimmed up, and then my cupcakes were ready to decorate. The cupcakes do need something to hold the two halves together for stability. A dab of frosting works very well as edible glue, however you could also carve a little space out of the center of your base and fill it with caramel or chocolate for a little extra surprise. I did find that it was significantly more difficult to decorate the mini cupcakes than I thought it would be. Because the cupcakes are so small, you really need to have a steady hand and good eyesight to get some of the designs that they show on the packaging. Fortunately, they also showcase one design that is easy to replicate and mine turned out perfectly when I gave that look a try.
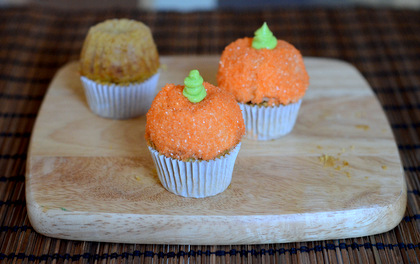
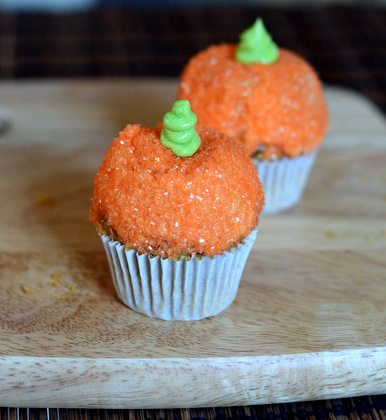
To achieve this sparkle pumpkin look, you need orange frosting, green frosting (just a little bit) and orange sanding sugar or sprinkles. Use a dab of frosting to hold the cake pieces together and chill the cake for a minute to help firm it up. Then, frost the top of the cupcake and gently roll  the frosted cake in sanding sugar. This will even out the look of the frosting even if your frosting job is less-than-perfect, and it will give the pumpkins a lovely, sparkly finished look. Pipe a little green frosting on top to act as a stem and you’re ready to serve.



What do you think?