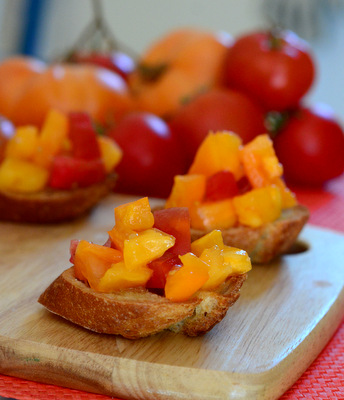
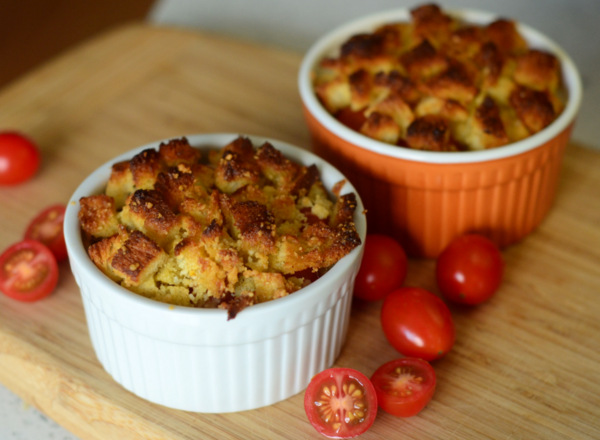
Archive for the ‘Savory Side Dishes and Salads’ Category

Secret Ingredient Biscuits

Secret Ingredient Biscuits

The wonderful thing about biscuits is that they pair well with almost every dish you can think of. You can serve them at breakfast, at lunch and and dinner – and you can even use them to make berry shortcakes for dessert. The even more wonderful thing about them is that they are quick and easy to make. But I have to say that no other biscuit recipe is as quick and easy to make as these Secret Ingredient Biscuits are.

Secret Ingredient Biscuits are fluffy, tender biscuits that get their name because they are made with an unusual ingredient: mayonnaise. The mayonnaise actually replaces butter (or other fats) that you would typically put into biscuit dough. It works because mayonnaise made with eggs and oil – two fat sources that are often used in biscuits.

I first saw this recipe in an issue of Cook’s Country (Mar/Apr 2013) and knew that I had to try them. Not only did they sound delicious, but the ingredient list was short and biscuits required virtually no prep time. It literally took less than 5 minutes to measure and mix the dough, then get the biscuits in the oven (which I had preheated). They were delicious, with a slightly savory quality from the mayonnaise that made them addictive – especially when they were served with a little bit of butter while they were still warm.

If you’re not a big mayonnaise fan, don’t worry: the biscuits don’t have a strong mayonnaise flavor and you probably wouldn’t know they were made with mayo. I did end up cutting back the amount of salt in the original recipe very slightly as my first batch turned out a touch salty, possibly because of the brand of mayonnaise that I was using – Best Foods, in this case. This is an easy recipe that everyone should be able to put together easily on short notice, and that means that it will be making a few more appearances in my house in the near future!

Cook’s Country calls for these biscuits to be made with full fat mayonnaise and whole milk, since it is the fat from these two items that tenderizes the biscuits and gives them their great texture. You can get away with using reduced fat versions of the two, but your biscuits may loose a bit of their tenderness. Fat free mayo and skim milk aren’t going to give you a good result here, so don’t use those if you want great biscuits.

Secret Ingredient Biscuits

+Continue Reading

Gluten Free Cheddar Cornbread

Gluten Free Cheddar Cornbread

Cornbread is a great side dish, whether you’re eating a bowl of soup or chili, or serving a big roast. It is easy to make and versatile enough that you can spice it up with all kinds of other flavors. Cornbread is also a recipe that can be easily adapted be gluten free. Cornmeal doesn’t contain any gluten and most recipes don’t contain that much flour, so it is actually very easy to substitute in gluten free flour blends and still get a delicious bread that is not much different from the original.

This Gluten Free Cheddar Cornbread is an adaptation of a basic buttermilk cornbread recipe that I often use, and I made it using a gluten free all purpose flour blend. The Trader Joe’s GF All Purpose Flour works very well in this particular recipe, but just about any all purpose blend should give you good results. The cornbread has a pleasantly crumbly texture and you get a lot of corn flavor from the cornmeal. I added a generous handful of shredded cheddar cheese to give the cornbread a more savory flavor, since I was planning to serve this batch with a batch of chili.

A common complaint about gluten free baking is that the finished products turn out to be a bit on the crumbly side. Most cornbreads are slightly crumbly, no matter which recipe you use, so this is one recipe where a crumbly texture doesn’t take anything away from the dish. If you don’t want to use cheese in the cornbread, you can omit it. Other variations you might try include substituting the cheese for corn or adding some chopped green onions or chives for another twist

And I will also note that if you don’t have gluten free flour in your kitchen, you can absolutely make this recipe using regular all purpose flour instead.

+Continue Reading

Cranberry, Apple and Sage Stuffing

Cranberry and Apple Stuffing
Oven-baked stuffing is a classic Thanksgiving side dish. While there are fans of stuffing that is actually stuffed in the bird, I find that stuffing baked in a baking dish is a lot more satisfying because the dish will have a crispy top and a perfectly moist base (and you don’t have to worry about the juice from an undercoked bird running into it). I have made all kinds of different stuffing recipes in the past, from Bacon, Pumpkin and Pecan Stuffing to Caramelized Onion Stuffing and Roasted Garlic Stuffing to Vegetarian Stuffing and a Browned Butter and Sage Stuffing. Most of these recipes are on the savory side, and while they offer a lot of great flavors, I wanted to try something a little different this year and I did that by incorporating some fruity elements into my stuffing.

Cranberry, Apple and Sage Stuffing has some savory flavors and some sweet flavors, for a balanced side dish that stands out from the crowd. This stuffing has a tart element to it that is a little unusual, but makes it a nice compliment to rich gravy and roast turkey at the Thanksgiving table. The tartness primarily comes from the fresh cranberries in the stuffing, which are bright in both color and flavor in a way that dried cranberries (which I sometimes include in my stuffing) are not. The apples also bring a bit of a sweet-tart flavor to the stuffing, although the degree of that depends on what kind of apples you’re using. I prefer to use not-too-tart apples, such as Honeycrisp.

Both fresh or dried sage will work in this recipe. Sage is a spice that I love in stuffing and this recipe is no exception, because it really goes very well with apples. I tend to use fresh sage when I have it. If you need to substitute dried sage for fresh, you should use approx 1 tbsp (instead of 3 tbsp of fresh) and make sure that your dried sage is still relatively fresh so you get the best flavor in the finished stuffing.

+Continue Reading

Browned Butter Pumpkin Dinner Rolls

Browned Butter and Pumpkin Dinner Rolls
Pumpkin is a great addition to yeast breads and rolls because it adds a lot of moisture that keeps the breads nice and soft. It also adds a subtle and slightly sweet flavor to the bread, too. These Browned Butter Pumpkin Dinner Rolls get both of these benefits from the pumpkin puree in the recipe, as well as gaining just a little bit of heartiness that makes these dinner rolls both tasty and satisfying. They are great with all kinds of soups and chilis, and they go especially with with big roasts (like a turkey dinner!) because they sop of gravy very, very well.

The browned butter is also an important component of this recipe. Melted butter could be used instead, but browned butter has a slightly nutty flavor that makes the rolls a little more unique – and just a little more irresistible. When you brown the butter, whether you do it on the stovetop or in the microwave, brown a little extra butter than is called for in the dough and set it aside. Use this extra butter to brush the tops of the rolls before and after baking to give them a little extra flavor and a nice finish.

The amount of flour in these rolls is approximate for two reasons. First, your climate can have a big impact on how much water your dough will need. Second, the consistency of your pumpkin puree can bring more or less moisture to the dough. If your puree has more water, you may need to add a little more flour than the recipe calls for, so be flexible and add a little more flour as needed to get the dough nice and elastic. The rolls can be shaped in to any size. You can also bake the individually, on a baking sheet, instead of all together in a baking dish as I have done. I personally like the “pull apart” style of dinner roll, and baking the rolls in a baking dish also means that you don’t need to be an expert at shaping dough into rolls to get great results.

These rolls keep very well for several days when kept well-wrapped, so they can be made a day or so in advance of serving them. +Continue Reading

Sweet Olive Oil Cornbread

Sweet Olive Oil Cornbread

There are two schools of thought on cornbread. One says that cornbread should be a hearty and savory bread, and that a plainer cornbread is better for soaking up the flavor of chilis and sauces. The members of the other school prefer a sweeter, cakier cornbread. I am definitely in the latter school of thought and I like sweeter cornbread. I like the softer texture and it seems to be a little bit more versatile to me, since I can serve it up with chili or bbq, or simply slather it with butter and eat it for a snack.

This Sweet Olive Oil Cornbread walks a nice line between sweet and savory, just leaning a little into the sweet side of things. It has a fluffy, tender crumb with just a bit of texture from the cornmeal. It isn’t sweet enough to turn into a cake, but the sugar in the recipe highlights the natural sweetness of the corn and the fruitiness of the olive oil. As with most recipes that include olive oil, it is a good idea to use a flavorful olive oil that you enjoy on its own for the best results in the recipe.

I baked this cornbread in a 9-inch round cake pan and cut it into generous wedges to serve. You can bake the same bread in a 9×9-inch square pan with about the same baking time, if you prefer square cornbread pieces. Serve this alongside a spicy chili to cut the heat a little bit, or smear it with butter and drizzle it with honey to sweeten it up even more. I think that this cornbread is best when served slightly warm, but leftovers will be just as good in a day or two if the cornbread is kept well-wrapped.
+Continue Reading

Visit Us On FacebookVisit Us On PinterestVisit Us On TwitterVisit Us On YoutubeCheck Our Feed