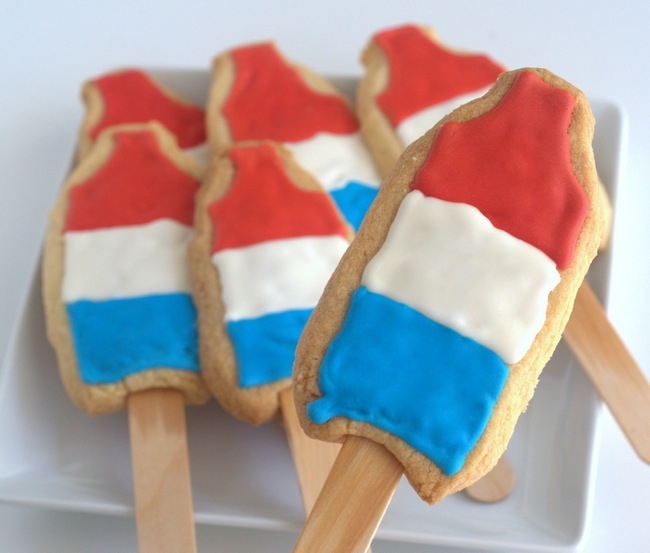
Rocket pops – also known as firecrackers or bomb pops – were always my popsicle of choice. I loved their look and shape – plus the combination of cherry, pineapple and raspberry flavors meant I never had to pick just one. I still enjoy them to this day and will pick one up at the convenience store or at a nice cream truck on a hot day. These Rocket Pop Cookies are inspired by those popsicles. They’re not served cold, but the red, white and blue cookies capture the look of those classic pops.
The cookies start with a vanilla sugar cookie dough that is one of my favorite for cut-out cookies, Not only is the dough easy to make, it doesn’t need to be chilled before you roll it out unless your kitchen is very hot (and even then, only for a couple of minutes. You’re going to need some popsicle sticks for this recipe and you can find them at cake decorating stores (and craft stores, but I would recommend sticking with ones that note they are food safe). Mine are a little bit longer than I would have liked, but I wanted relatively wide popsicle sticks to support the weight of the cookies and I wasn’t going to get too picky about it. These are about 1/2-inch wide.
Once the cookie dough is prepared, roll it out into a rectangle and cut it into small rectangles that are about 2-inches by 5-inches. If you have a bottle-shaped cookie cutter, you can use that, too. Trim the tops of the rectangles to resemble a rocket pop, then insert a paring knife into the bottom of the cookie – parallel to the counter – to make a pocket for the popsicle stick. Make sure the stick goes in at least half way.
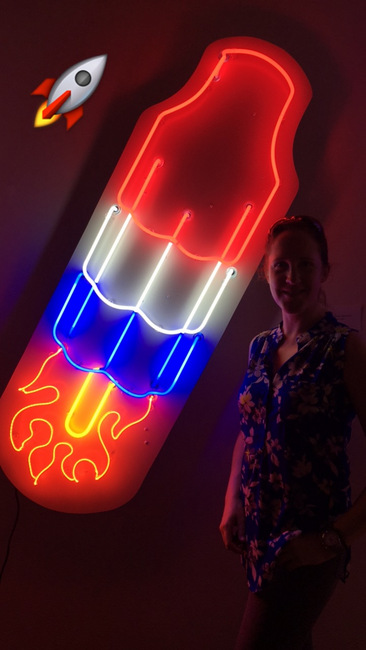
The classic popsicles may have inspired these cookies, but they also inspired another art piece – a neon artwork I recently made at Lili Lakich Studio in Los Angeles. Lili is a world-renowned neon artist and holds great workshops where beginners (like me!) can learn to design and construct together neon art. My Rocket Pop piece was so much fun to make and these cookies give me the perfect excuse to show it off here!
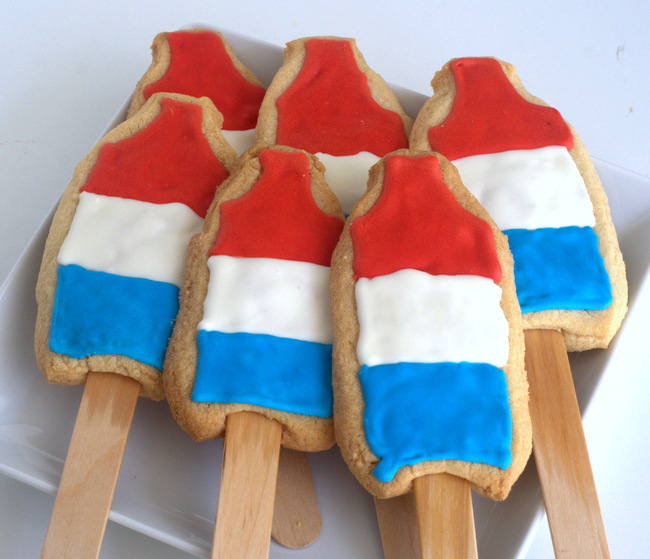
The finishing touch on these cookies is the red, white and blue icing, which takes the cookies from oddly-shaped cookie popsicles to true rocket pops. You will need a batch of royal icing, along with red and blue food coloring (recipe below). Be generous with the colors, as you want the cookies to be bold. To get a nice consistency for “flooding” the icing onto the cookie, you may need to add in a teaspoon or two of water to each batch to thin it out. Don’t be afraid to play around with the icing a bit to get it where you want. Once iced, the cookies will need to dry for 8-12 hours before they are ready to eat. Fortunately, the cookies have a great shelf life and will last several days an in airtight container.
Rocket Pop Cookies
1 cup butter, room temperature
1 1/2 cups sugar
1 large egg
1 tsp vanilla extract
1/4 tsp almond extract
1 tsp salt
2 3/4 cups + 2 tbsp all purpose flour
approx 2 1/2-3 dozen wide popsicle sticks
1/2 batch Royal Icing
Preheat oven to 350F. Line a baking sheet with parchment paper.
In a large mixing bowl or the bowl of a stand mixer, cream together butter and sugar until light and fluffy. Beat in egg, vanilla extract and almond extract.
With the mixer on low speed, mix in the salt and gradually blend in the flour until it is completely incorporated and the dough comes together into a smooth ball. Dough will be thick.
Divide dough in half and gently knead if dough is not completely smooth.
Place half of the dough on a well-floured work surface and roll out to 1/4-inch thickness. Cut out dough into 2×5-inch rectangles, or use a similarly sized bottle-shaped cookie cutter.
Transfer cookies to prepared baking sheet. Gather and reroll cookie dough scraps. Repeat with second half of the cookie dough.
Using a knife or the edge of a round cookie cutter, shape the tops of the rectangles into rocket pop shapes by making round cuts in the top corners. Insert a paring knife into the bottom of the cookie, parallel to the counter, to make a pocket. Insert a popsicle stick into each pocket.
Chill cut out cookies on the baking sheet for 10 minutes before baking.
Bake for about 15 minutes, depending on the size of the cookie, until cookies are set and very lightly browned around the edges.
Allow cookies to cool for 5 minutes on the baking sheet, then transfer to a wire rack to cool completely.
To frost: Make Royal Icing (half batch) and divide it into three bowls. Tint one bowl red, one blue and leave one white. Thin the icing as needed with a little bit of water to make it flow more easily when piping.
Pipe red, white and blue design shown on the cookies above. Work with one color at a time, starting with red and working your way down the cookie.
Allow icing to dry for 8-12 hours before serving or storing.
Makes about 3 dozen cookies.


What do you think?