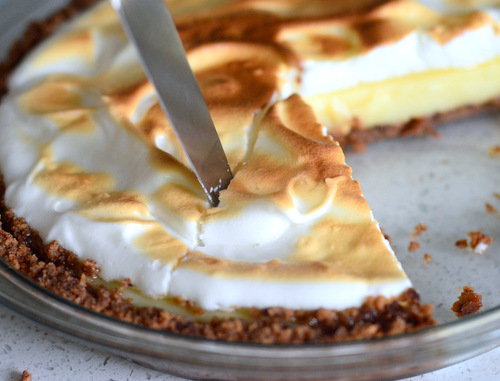
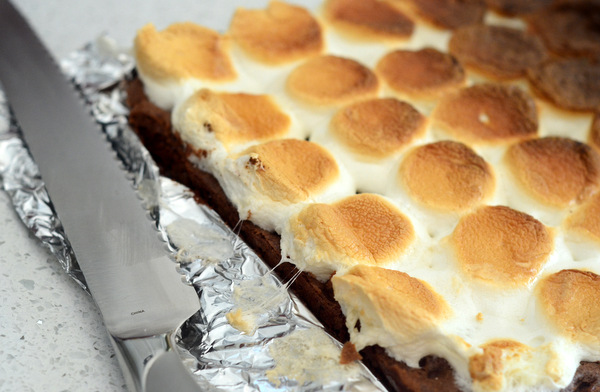
Archive for: how-to

With just a few exceptions, most baking recipes call for butter to be softened or at room temperature. Softened butter spreads easily onto bread and toast, and it whips up into a fluffy mixture with sugar that helps produce a fine, tender crumb in baked goods. Chilled butter is too hard to cream into sugar easily and melted butter simply begins to dissolve the sugar, and does not create the light mixture produced by creaming.
The best way to soften butter is by leaving it out on the counter for an hour or so before you will need to use it. The exact time will vary depending on the temperature in your kitchen and in hot weather your butter will soften much more quickly than in cold! Softened butter should yield easily to a gentle squeeze of the wrapper and it should have an easy-to-spread consistency, so that a butter knife can easily cut through it and scoop some up. The butter should not be so soft that it cannot hold its shape or that it has begun to melt. If it is very hot, keep a close eye on softening butter so that it does not over-soften and pop it back into the fridge before it gets to that point if you’re not ready to use it.
If you need to soften your butter quickly, it is not a good idea to pop it in the microwave for a few seconds. This can melt the butter and, while it will probably not have a big impact in a batch of chocolate chip cookies, it actually can impact the fluffiness of the crumb in a cake recipe. The best thing to do is to chop the butter up into small pieces, as they will soften faster than a whole block of butter. You can put the pieces into a mixing bowl and beat it (starting on low speed) with a mixer or the paddle attachment of a stand mixer to encourage it to soften. A few minutes of mixing along with 10-15 minutes of sitting out in small pieces should soften the butter enough to use in a recipe.

Vanilla beans are a pricey ingredient prized by bakers and cooks because nothing imparts vanilla flavor like seeds scraped straight from a fresh vanilla pod. I usually have a few vanilla beans on hand and, like so many other deal-hunting bakers, I try to replenish my supply when I find a good deal on bulk vanilla beans (the holidays are a great time to stock up). Having a large supply of vanilla beans on hand begs a question: how long do vanilla beans last?
Vanilla beans will keep for at least a year when properly stored, and can last more than two years in ideal conditions. They should be stored in a closed container in a cool, dry place. An airtight container will help to keep the beans moist, but it is not necessary for storage. Most purveyors recommend letting your beans breathe by exposing them to air every few weeks for a few minutes – particularly when the beans are stored in an airtight container. Vanilla beans should never be stored in the refrigerator, as the moist environment in the fridge can actually encourage mold to grow on the beans. If you live in a very humid place, it is best to buy vanilla beans in smaller quantities and use them when they are fresher to ensure that you get the best results.
The beans may dry out over time, but that doesn’t mean that you can’t use them. To refresh a dried vanilla bean, submerge it in hot water for a few minutes before using to plump it up, or simply wrap it in a moist paper towel and microwave it for a few seconds. Once the bean has been softened again, it is easy to split it and scrape out the seeds. Vanilla beans that have already been used to infuse a custard or other dish can be dried out again and saved almost indefinitely, adding their remaining flavor and aroma to things like vanilla sugar.

My grandmother was a huge fan of Deviled Eggs and made them for all kinds of holidays and family gatherings as I was growing up. I became a fan, too, so as soon as I was old enough to operate the stove safely I asked my grandmother to teach me how to make them myself. I made them with her whenever I visited, and these days I often just make myself them as a snack.
Good deviled eggs start out with good hard boiled eggs. Actually, there are lots of egg dishes (from egg salad to and brightly colored Easter eggs) that start out with hard boiled eggs. The trick to getting a perfectly cooked hard boiled egg is to cook it just long enough to cook through without making the egg tough or discolored. Nothing is less appealing than opening a hard boiled egg and seeing a gray-green cast to the once-yellow yolk. That gray-green color results from overheating eggs, which causes sulfur to be released from the egg whites and turn an discolor canary-yellow yolk.
My grandma tended to estimate the time the eggs needed to boil, but I find that an actual timer works much better. I start by placing my eggs in a pot and add just enough water (tap water) to cover them.

+Continue Reading

Orange slices make a delicious addition to salads, fruit compotes and even to baked goods, but the membrane that makes oranges easy to peel and section by hand can make a tough addition to any of these sweet dishes. Generally, the best way to prepare an orange to go into a dish is to supreme it. Supreming an orange, sometimes described as sectioning an orange, is when you cut an orange (or other citrus fruit) down to its most tender and jewel-like segments. It is easy to do and all you need to get started is a very sharp paring knife.
Start by removing about 1/2 inch from the top and bottom of your orange. You want to reveal the fruit beneath the peel and you don’t want to cut away too much of the fruit, so the exact size of your rounds will vary based on the size of your fruit.

+Continue Reading

The only baked good cuter than a cupcake is a mini cupcake, but there aren’t as many recipes out there for these downsized goodies as there are for their full-sized counterparts. Fortunately, it is not difficult to turn a batch of full sized cupcakes into miniature ones as long as you have a mini muffin pan to work with.
Most cupcake recipes can be made into mini cupcakes. Mini cupcake pans hold roughly 1/3 of the amount of regular cupcake pans, so if you have a recipe that yields 12 full sized cupcakes, you’ll get 36 minis from the same amount of batter. It is much easier to start with the full recipe and make a big batch of minis than to cut down the recipe, as there are some recipes that don’t take well to downsizing.
Once you have your batter, fill up the mini muffin pan as you would a regular muffin pan (filling each cup somewhere between 2/3 and 3/4 full) and pop the tray in the oven. While most cupcakes take about 15-20 minutes to bake, most mini cupcakes take from 9-14 minutes or so to reach donenss. Check your minis at 9 or 10 minutes with a toothpick and bake longer as needed. The only thing you really need to look out for is the fact that it is easy to overbake these miniature cakes, so keep a close eye on them while they’re baking and check them at very short intervals when they’re close to being done.
+Continue Reading