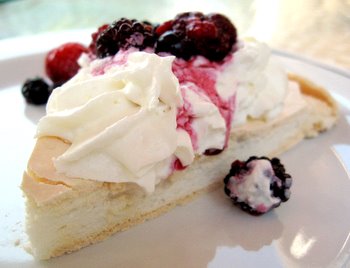
Archive for: meringue

Berry-Topped Pavlova

berried pav slice

If you like meringue, but you’ve never had a pavlova, you’re missing out. Pavlovasare sweet meringues that are baked until crisp on the outside and marshmallowy on the inside. There is some debated over when the recipe was first developed, and whether it was in Australia or New Zealand, but in either case, it has been around since approximately 1930 and is just as popular as it ever was. The meringue shell is typically very large – almost cake-sized – for a pavlova and the size helps give it its unique, cloud-like interior as it bakes. The size also allows plenty of room for whipped cream and other toppings to be piled on before serving.

Whipped cream is definitely the topping of choice for pavs. I know that some people – including myself on occasion – have mixed some whipped cream with sour cream or yogurt for a slightly thicker topping that is a bit lighter (in terms of calories) than straight whipped cream. Regardless of what type of whipped topping you decide to use, top it off with some berries.

Kiwis and strawberries are popular choices, but I used a mix of berries for mine. Raspberries, blueberries, blackberries and strawberries are all excellent. Fresh berries are the optimal choice, especially since fresh, ripe berries are still readily available at this time of year. If you can’t get them, however, frozen berries can work just as well. Defrost them completely before using and take advantage of the fact that they are often frozen with a bit of juice and drizzle a bit on top of the pavlova before serving for an extra splash of color.

The shell of the pavlova will crack easily under the pressure of a fork, but you should still be able to slice it and serve as you would a cake or a pie. If you want a smaller pav, try baking four smaller sizes with the recipe amount given below. They might be a bit crisper than their full-sized counterpart, but with whipped cream and berries to top them off, I highly doubt you’ll hear any complaints.
+Continue Reading

Lemon Meringue Pie

I definately admire Gale Gand, the ever-so-talented pastry chef and owner of Chicago’s Tru Restaurant. Her books, including Butter, Sugar, Flour, Eggs - which this recipe comes from – are wonderful and detailed. Her TV show also really resonated with my deep love of desserts. I think that my first time watching it was the first time I ever saw a real pastry chef in action. Gale, though incredibly innovative, has a soft spot for the desserts that some (food snobs) would certainly consider to be too homey to be truly worthwhile – like the mud pies she made as a little girl. While I don’t necessarily consider Lemon Meringue to be homey, I do consider it a classic that is worth making.

Lemon meringue pie is a diner staple across the country. It is quite easy to make and takes less time and talent than even a fruit pie does. Essentially, the crust is prebaked, filled with a very thick curd and topped with meringue, which is then browned lightly in the oven.If you keep a stock of prebaked pie shells (or buy them from the market), you can have a fresh pie in practically record time.

Since Gale is a pastry chef, her recipe has a few features that are different from many lemon meringue pie recipes. Her filling is thickened with a combination of flour and cornstarch and the lemon flavor is brightened with a tiny bit of lemon oil (or extract). Almost all lemon fillings are thickend with flour and/or cornstarch to create something that you can actually slice into cleanly. To create a stable, weepless meringue, a sugar syrup is cooked and streamed into beaten egg whites. This actually “cooks” the eggs, so the meringue will last longer than a simple meringue.

I love lemon meringue pies (especially this one) because I love the smooth tartness of the lemon filling and the fluffy, slight sweetness of the meringue. Unlike topping a pie with whipped cream, the taste is very clean and not unctuous. I used my own crust recipe, but Gale’s full recipe is available online. My meringue did separate slightly from the filling, so make sure to wait until your filling is cooled to room temperature before topping it with the meringue. This pie cuts beautifully and the filling maintains its shape. To avoid having the meringue stick to the knife, run it under very hot water for a few seconds before slicing.

+Continue Reading

How to Beat Egg Whites

Egg whites, beaten

I have decided that we need to talk about egg whites. Their chief purpose, in baking, is to lend structure to baked goods. They also add liquid to a recipe, but I’m not going to deal with that right now. Because of the unique properties of egg whites, they alone can be used to leaven things like cakes without the aid of yeast or chemical leaveners.

When recipes call for egg whites, they typically call for them to be beaten. This causes a lot of confusion for people because recipes ask you to beat the whites “until foamy”, “until the batter falls from the beaters in ribbons”, “until glossy” or “until soft/stiff peaks form”.

Here is a mini tutorial, based on making meringue (which involves beating sugar into the whites as you whip them). The texture of the whites will be similar (though perhaps slightly less glossy) when whipping egg whites alone, so the illustrations can be used as a reference in multiple situations.

Start with room temperature egg whites. I don’t use copper bowls. Though it is harder to overbeat your egg whites in one, this is because copper ions migrate into the egg whites. Egg whites beaten in a copper bowl will be slightly yellowish and more stable than ones beaten in other bowls, but I still don’t like the idea that copper ions are now in my cake/food. To give extra stabilization to the egg whites in non copper bowls, you can add cream of tartar when you are beating them, if you wish.

+Continue Reading

Visit Us On FacebookVisit Us On PinterestVisit Us On TwitterVisit Us On YoutubeCheck Our Feed