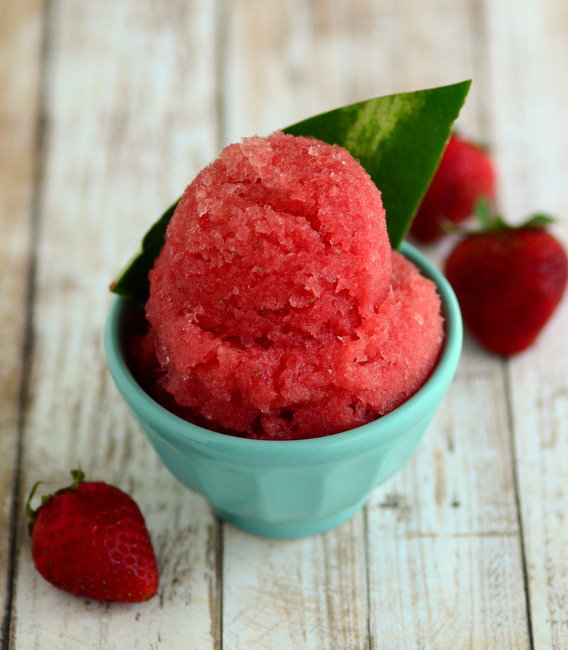
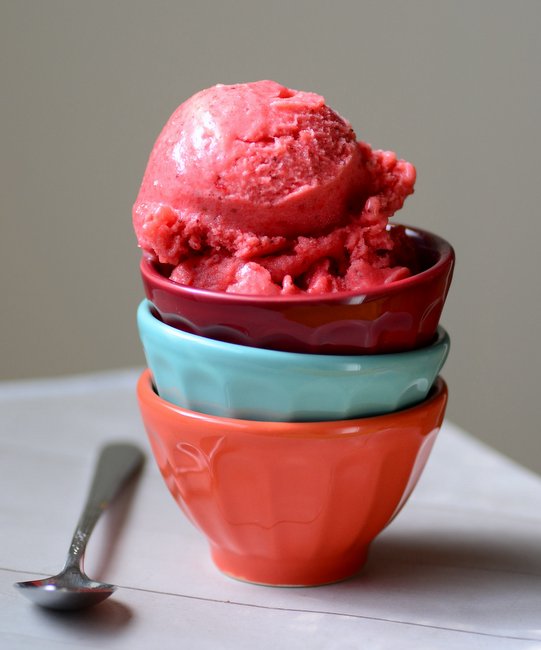
Archive for the ‘Frozen Desserts’ Category

How to make ice cream with dry ice

Dry Ice in the Stand Mixer
Homemade ice cream is a wonderful treat, but you really do need an ice cream maker for the best and most consistent results. There are many affordable ice cream makers out there (and plenty of more expensive ones!) that will pay for themselves if you make ice cream yourself regularly. If you don’t make ice cream on a regular basis, however, you probably don’t want another appliance taking up valuable room in your kitchen. So, is it possible to make great ice cream at home without an ice cream maker? Yes, and the secret is to use dry ice.

Dry ice is solid carbon dioxide and it has a temperature of -109.3F (78.5C). It is primarily used for preserving ice cream and other frozen foods at very cold temperatures. For instance, it may be used to chill the interior of an ice cream cart on a hot day at the park so the popsicles don’t melt before they’re sold. It is also often added to Halloween punch because of the fog-like clouds that it generates when put into water or other liquids.

But how can you make ice cream with it?
+Continue Reading

Fresh Strawberry Ice Cream

Strawberry Ice Cream Cone
Strawberries are at their very best for only a few weeks each year. You can find great strawberries on either end of the growing season, from a patch that hit their stride early or from some that blossomed later than usual, but the ones that are really worth eating are those that you get during the height of the season. I freeze some strawberries for use during the off-season, but I think an even better way to enjoy strawberries into the fall and winter is to make a couple of batches of Fresh Strawberry Ice Cream and stock your freezer with them.

This strawberry ice cream is a very simple recipe, made with lots of fresh strawberries and a egg-enriched custard base that produces a very creamy finished product. To make it, the fresh berries are pureed with sugar, then added to the custard base. It may seem as though their is quite a lot of sugar in this ice cream, especially considering that you are using already sweet berries to start with, but there are two very good reasons for this. First, the sugar helps keep the ice cream creamy and soft, much smoother than it would be with less sugar. Second, when foods are cold their flavors are more muted, so adding a little extra sugar to the ice cream base helps the strawberries to stand out after the ice cream is churned.

Instead of infusing the milk mixture with a vanilla bean when making the custard for this ice cream, I opted to use vanilla extract. I only wanted a little bit of vanilla flavor in my ice cream and didn’t want anything to compete with the flavor of the strawberries. The result is a sweet and very creamy ice cream that is bursting with fresh strawberry flavor. I got my strawberry puree to be very fine, so there were only traces of the whole fruit in my finished ice cream. If you want to add in some strawberry pieces, finely chop a few berries and stir them into the ice cream after it has finished churning and before you put it in the freezer.

This ice cream will keep well in the freezer, stored in a well-sealed container, for a couple of months. If you plan on having enough ice cream to enjoy through the holidays, however, I’d recommend making two or three batches. It makes 1 1/2 quarts of ice cream, which is a size that most at-home ice cream makers can handle easily.

+Continue Reading

Mint Chocolate Chip Brownie Ice Cream Sandwiches

Mint Chocolate Chip Brownie Ice Cream Sandwiches
Ice cream sandwiches are a fun summertime treat. They’re easy to make, because you can take just about any pair of cookies and stuff them full of whatever ice cream you have in the freezer for an instant ice cream sandwich. Now, some types of cookies work better as ice cream sandwiches than others. You want cookies that are tender, slightly soft and fairly thin. This results in ice cream sandwiches that you can fit in your mouth and won’t be hard as rocks when you make them in advance and store them in the freezer! But brownies often work better than cookies. Not only does chocolate go with just about every flavor of ice cream out there, but brownies are more tender than cookies and tend to make a softer, easier to eat ice cream sandwich that most cookies do.

These Mint Chocolate Chip Brownie Ice Cream Sandwiches are definitely a great choice for ice cream sandwich lovers. The brownies are rich and chocolaty, with a hint of cakiness to them that helps keep them easy to bite into even after freezing (great when you don’t have a whole lot of patience for digging into that sandwich!). The brownies are baked in a 9×13 pan and, after cooling, the whole batch of brownies is cut in half. Softened ice cream is spread onto on half of the brownies and the second half is stacked on top. Chill the whole thing and then use a sharp knife to divide up the block into small ice cream sandwiches. The brownie layers are still relatively thick (especially compared to a store bought ice cream sandwich), but I definitely like to have a good brownie:ice cream ratio.

I used mint chocolate chip ice cream inside of these brownies and added a little peppermint extract to the brownie batter, as well. The mint chocolate brownies will still go nicely with chocolate or vanilla ice cream, but omit the mint extract if you prefer to use something like peach ice cream or rocky road as your filling. If you really want to make the brownie layer thinner, cut the sheet in half, chill the brownies slightly and use a large, serrated knife to cut them in half horizontally. You’ll get less brownie in each sandwich, but you’ll end up with twice as many sandwiches this way!
+Continue Reading

Homemade Rocky Road Ice Cream

Homemade Rocky Road Ice Cream
Rocky Road ice cream is a flavor with a great story behind it. It was created in March of 1929 by ice cream makers Joseph Edy and William Dreyer, who put marshmallows and walnuts into chocolate ice cream. After the big Stock Market Crash in December of 1929 (which started the Great Depression), the partners gave the flavor it’s current name – Rocky Road – “to give folks something to smile about in the midst of the Great Depression.” Even the story puts a smile on my face, and the ice cream itself is one of the most popular flavors out there almost a century later.

Rich chocolate ice cream, crunchy walnuts and sweet, fluffy marshmallows are a fantastic combination for an ice cream flavor. I start my Homemade Rocky Road Ice Cream with a classic chocolate ice cream base. The basic custard is made with milk and cream, and thickened with egg yolks. The chocolate flavor comes both from semisweet chocolate and cocoa powder, so it has a really balanced chocolate flavor that is neither too dark nor too sweet, but just right for a batch of rocky road. You’ll need an ice cream maker to get the best, creamiest results with this recipe – and with most homemade ice cream recipes, so it is worth investing in one if you’re an ice cream lover planning to make it yourself on a regular basis.

My biggest complaint with rocky road ice creams that you can buy at ice cream shops or at grocery stores is that they don’t have enough stuff in them. Not that there is anything wrong with chocolate ice cream on its own, but if I wanted plain chocolate I would buy that! Fortunately, when you’re making your own ice cream you have a lot of control over how many add-ins you can add. I like to put in a lot of miniature marshmallows (homemade will work, but I tend to prefer the lighter store-bought minis for ice cream) and plenty of nuts. Walnuts are classic for rocky road, though I will often use a combination of toasted walnuts and pecans when I’m making it at home.

+Continue Reading

Creamsicle Ice Cream Cupcakes

Orange Creamsicle Cupcakes
Who doesn’t like a creamsicle on a hot summer day? The ice cream-filled orange popsicle is a favorite summertime treat for many people – and this is that classic popsicle in cupcake form. These Creamsicle Ice Cream Cupcakes are orange cupcakes that are filled with vanilla bean ice cream and topped with a zesty orange glaze. Like their popsicle namesakes, these are stored in the freezer and ready to serve as a cool treat on a hot day or any other time that a creamsicle craving hits!

The cupcakes are easy to make and turn out to be moist and tender. I used both butter and vegetable oil in the cake, as cakes made with vegetable oil tend to stay a little bit moister after being frozen. Freshly squeezed orange juice is going to give you the best flavor in these cupcakes, and by freshly squeezing the oranges you’ll also have plenty of zest to further boost the flavor. If you don’t have oranges at hand, you can use bottled orange juice. Again, try to go with fresh, not-from-concentrate juice for the best flavor even when using bottled juice. The cupcakes will still turn out well, but the orange flavor might be slightly subdued. To punch it up even further, add a bit of orange extract or a few drops of orange oil to the batter.

The finished cakes have a great combination of orange and vanilla flavors. When I hollowed out the cupcakes to fill them with ice cream, I tried to make as much room for the filling as possible. I also used a good quality vanilla bean ice cream, slightly softened, to fill them up. The glaze added some extra sweetness and brightness to the cakes, and really reminded me of the orange “shell” that makes up the outer layer of a creamsicle.

These cupcakes should be stored in the freezer and taken out shortly before serving. Once they are glazed, allow them to set up in the freezer for at least an hour. At that point, you can cover them with plastic wrap and they’ll keep for a week at the very least (probably quite a bit longer if you have a lot of self control!). The orange glaze gives you a nice burst of orange when you take a bite, and it sets up very nicely in the freezer without getting too hard. If you are in a hurry to dig in, just stuff the cupcakes with ice cream, top with a spoonful of glaze and serve right away!

Orange Creamsicle Cupcakes
+Continue Reading